With our new house, I was very excited to start planning our garden and landscaping, but to be honest also very intimidated. I had done a bit of gardening at our rentals over the years, but always at a fairly small scale. I knew I wanted to go much bigger with my ambitions, but I didn’t have any experience in landscape design.
Our yard is quite big for the inner city. It’s a full double lot (just under a quarter acre) and our house has a fairly small footprint, so there’s plenty of space left over. Other than a couple huge trees, the yard was entirely turfgrass when we moved in, and I knew I wanted to kill most of that. This meant that I had a blank slate to work with, and while great in a lot of ways, that also meant that I didn’t have anything to guide my decisions or limit my options.
It was clear that I needed help.
-
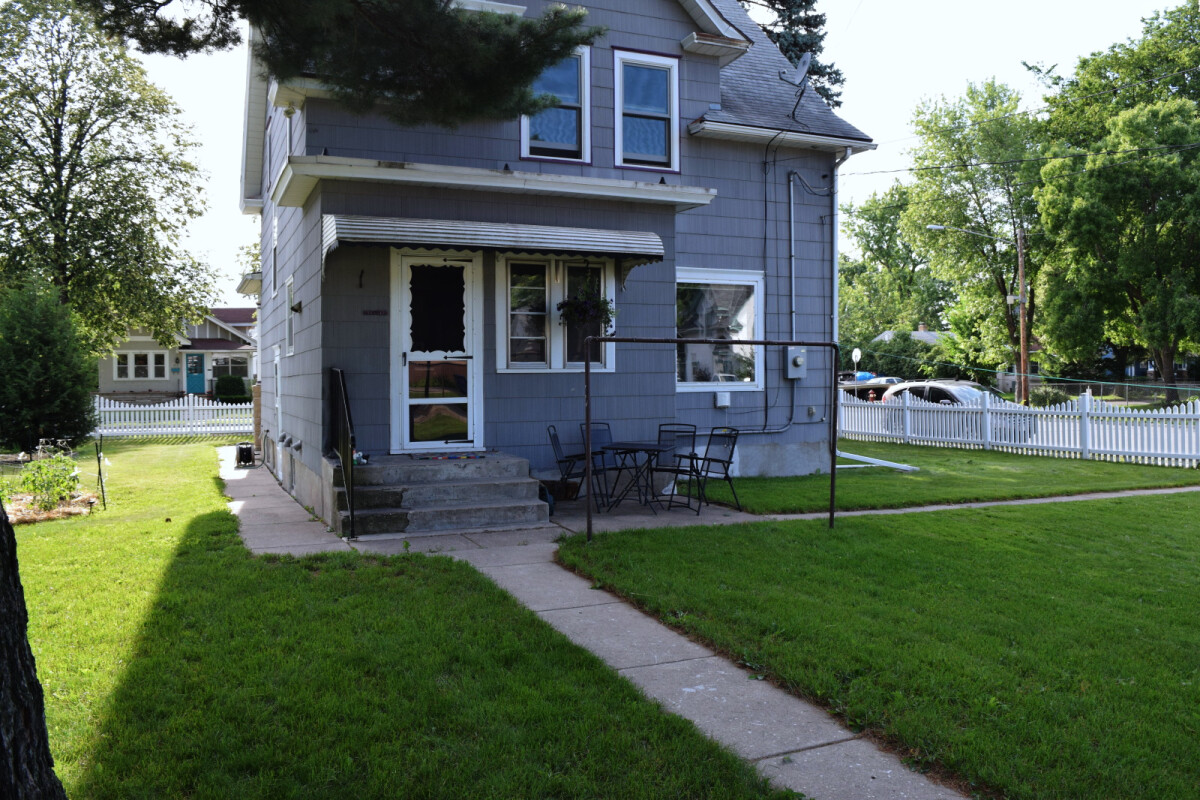
The future is wide open.
-
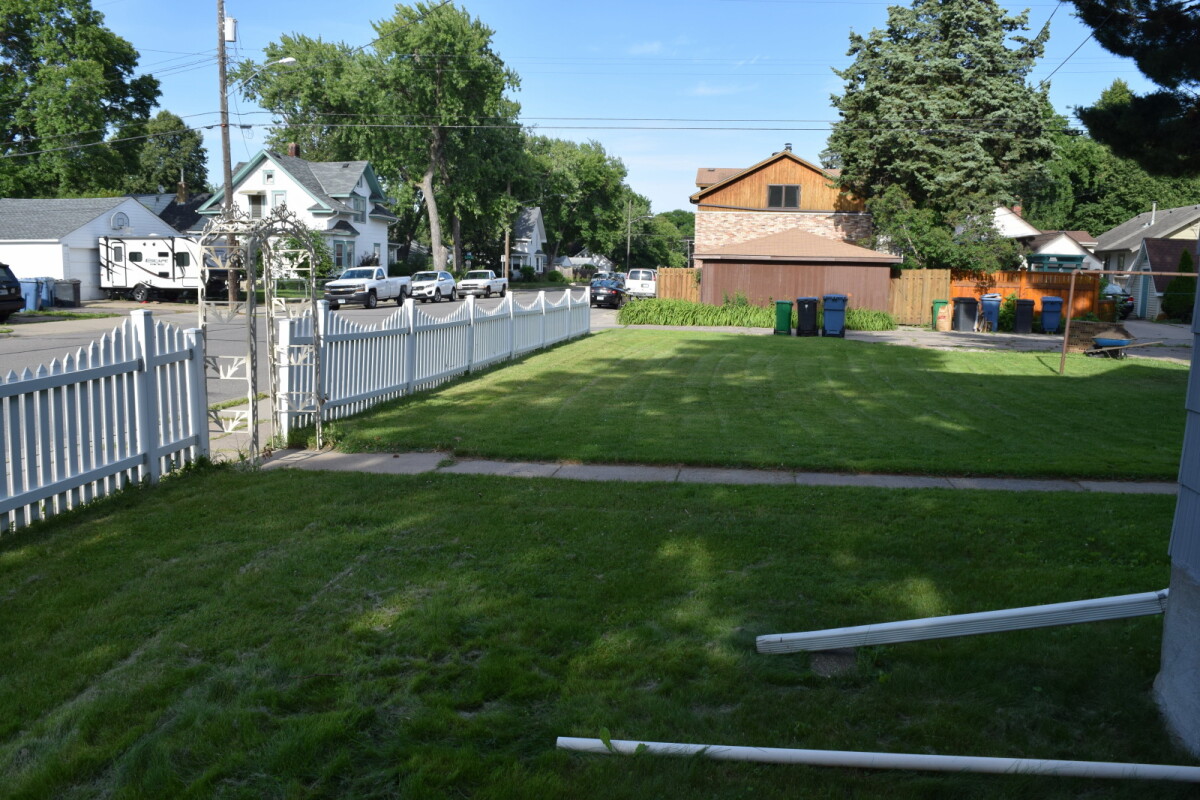
So. Much. Grass.
I could have gone with a traditional landscape design firm, but I hate to imagine how much they would have charged me for a set of fancy full-color plans. Besides, this wouldn’t have been a good fit for how I wanted to manage the garden. I wanted to handle most of the installation and maintenance myself, and I knew the design would need to change over time. This meant I needed a strong understanding of the rationale behind the design and how all the pieces fit together—not something I was likely to get out of having a complete set of plans dropped in my lap. I also wanted a garden that was uniquely tailored to our needs, not just the same ten plants that the landscaper uses in every yard they design.
I paid a garden consultant to do a site visit and draw up an informal set of layouts. While I didn’t end up using most of her designs, the process did get me started thinking about how to determine how to use a space, and it gave me a sense of the possibilities available to us. I could start to see the shape of the thing I needed to do, I just needed a lot more practical information to actually be able to do it.
Observe and Interact
One of the best decisions I made in the planning process was forced upon me. We finished a rocky closing process for our house at the end of April, and the timesuck of buying a house, moving, and being first-time homeowners meant that I had very little time to plan or prepare as planting season rolled around in May. This necessarily limited how much I could expect to achieve in the first year, so I planted a modest vegetable garden and accepted that my bigger ambitions would need to wait a year.
This was good, because major site planning decisions really should not be made until one has been able to observe conditions throughout a growing season. I probably wouldn’t have followed this advice well if I had a few more months of lead time before spring, but I’m glad I didn’t have that choice.
Spending the first year observing allowed me to see how the site changed over time: what kind of runoff came from the house during rainstorms, where water pooled during wet periods, which areas got the most and least sun, where the grass grew well and where it didn’t, and so on. It gave me time to take detailed measurements, draw maps, and conduct soil tests. And it gave me time to learn a lot more, to roll ideas around in my head, to sketch out possibilities while looking at the site, and to get outside and pace out distances on the ground when I needed to see it in situ.
Getting educated
One of the things I figured out in the process of reading about gardening stuff was that the permaculture philosophy greatly appealed to me. What is permaculture? There are many answers to that question, few of them short, but I like this one pretty well:
Permaculture (the word, coined by Bill Mollison, is a portmanteau of permanent agriculture and permanent culture) is the conscious design and maintenance of agriculturally productive ecosystems which have the diversity, stability, and resilience of natural ecosystems… [It] is a system of assembling conceptual, material, and strategic components in a pattern which functions to benefit life in all its forms. The philosophy behind permaculture is one of working with, rather than against, nature; of protracted and thoughtful observation rather than protracted and thoughtless action; of looking at systems in all their functions, rather than asking only one yield of them; and allowing systems to demonstrate their own evolutions.
There are a certain set of gardening practices (food forests, hugelkultur, comfrey) that have become associated with permaculture, some of which I do find appealing, but for me those were not as much of a draw as the whole-design nature of the idea. Many other garden ideologies like organic gardening or square foot gardening tend to be centered around one specific concept plus a loose constellation of practices compatible with the core idea. While many of them have useful advice to offer, I don’t find them compelling as an organizing principle for everything. Permaculture, in being primarily a design philosophy, credibly promises guidance on the entirety of the system—not only how one manages a garden, but how a garden can fit into your life and the surrounding world. It provides not only tools for thinking about design, but tools for thinking about the act of designing.
My entry point for permaculture was Toby Hemenway’s Gaia’s Garden. It’s a lovely book that provides a very accessible overview of the concepts that drive permaculture design. It’s not the final word on the subject, but it was a great place to learn the concepts and terminology, and to gather ideas about how I could apply these concepts in my own space.
Permaculture also gave me a descriptive term for exploring and discovering useful information. Because it is aligned with many of the things I wanted out of the garden (beyond-organic, low-input, ecological), I could peruse permaculture sources as a starting point and learn about ideas and techniques that were likely to appeal to me. It would be fair to point out that some permaculturists are pretty wacky and not all of their ideas are good. I’m pretty skilled at sifting through information of varying quality, so this was not a big deal for me, but a more credulous person could be led astray by bad advice.
The other major breakthrough in my planning education was probably the most valuable book purchase I’ve ever made: Edible Forest Gardens, Volume Two.
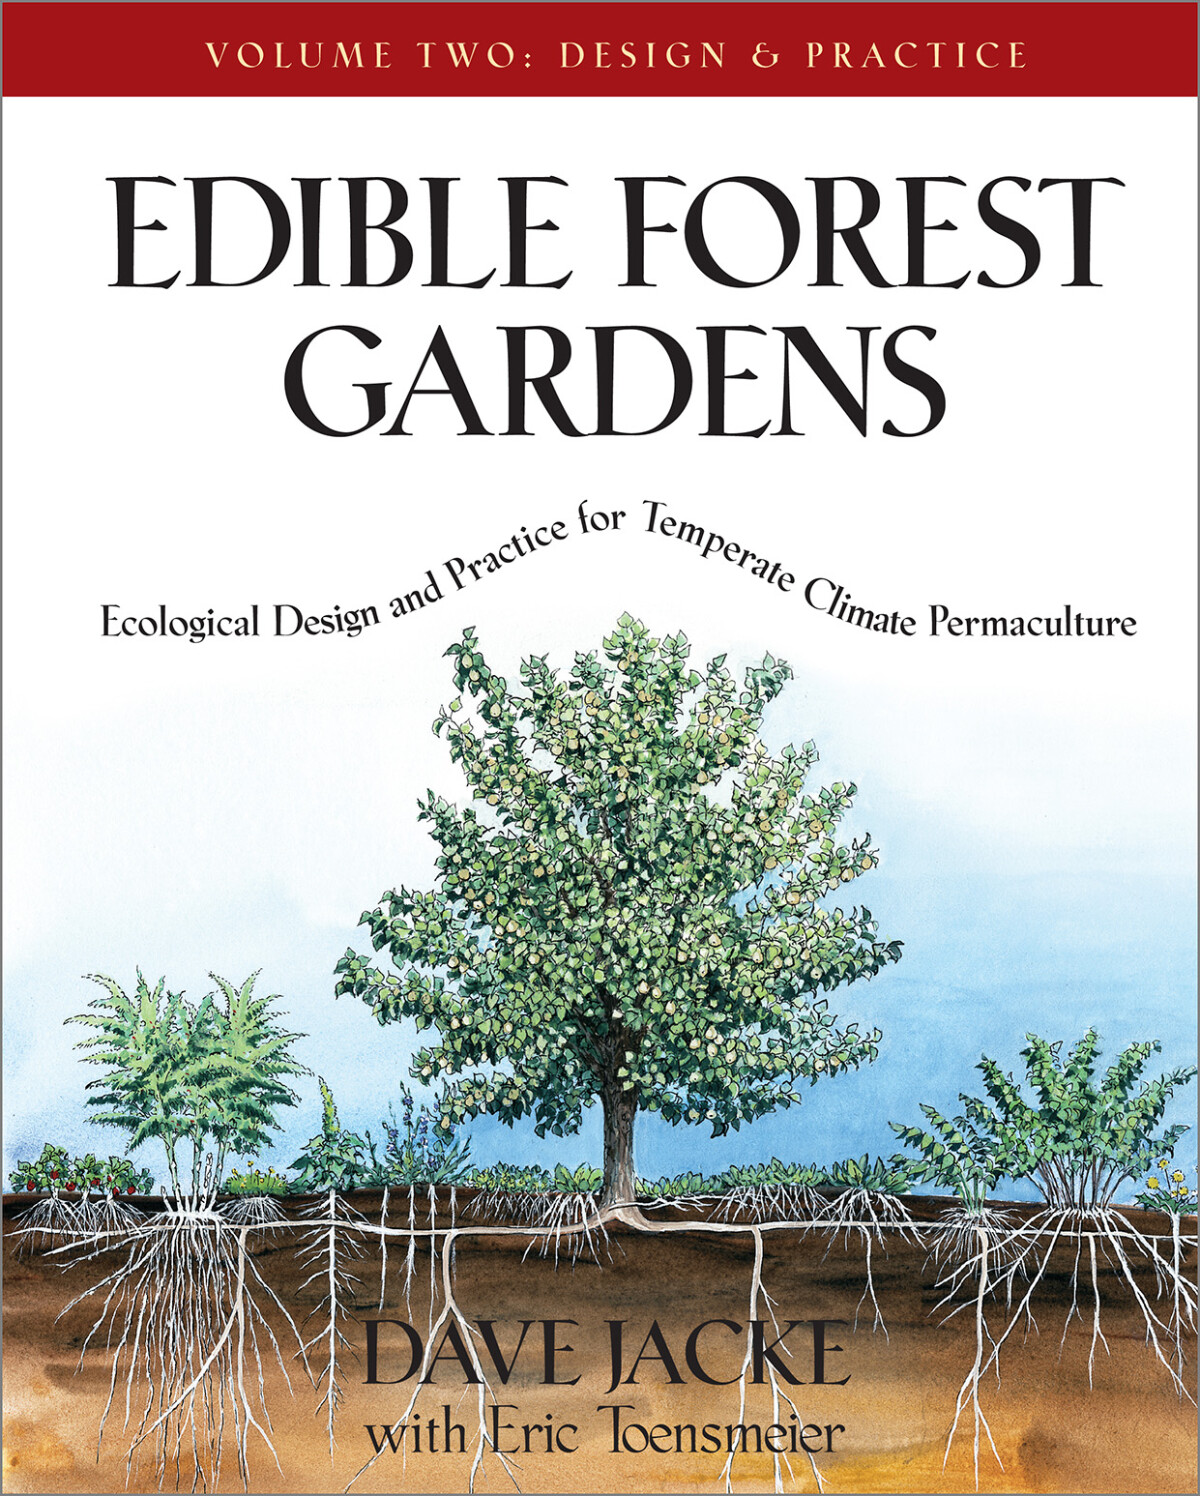
Side note: there is a Volume One, which provides a conceptual background on permaculture and temperate climate forest gardens in particular. It’s a perfectly nice book, but not essential if you’ve picked up the gist from other sources. All the meat is in Volume Two, which focuses on practical applications.
Edible Forest Gardens, Volume Two is a stellar permacultural resource, with extensive plant lists and tables. But it’s also an excellent guide to the design process in general. It offers an extremely thorough design program that you can follow to the letter or simply pluck out the parts that appeal to you, and it covers the whole spectrum from very broad exercises like defining the vision for your site, to very specific advice like the best way to plant a tree. I referred to this book a ton throughout every step of my process. It was particularly valuable early on, as I was struggling to figure out where to begin. The design exercises gave me tools to move from ideas to action. Let’s take a look at some of the interesting ones.
Let’s begin
The early part of the planning process was turning the dreams I had floating around in my head into concrete goals, large and small:
- A large garden plot dedicated to food production
- Fruit trees and berry bushes
- Food and habitat for pollinators, birds, and other wildlife
- As much of a fully-functioning natural ecosystem as possible
- Features to draw charismatic wildlife such as hummingbirds and butterflies
- Beauty in all four seasons, both for our enjoyment and for passersby
- Areas for relaxing outside
- Flexible space for gatherings, activities, dog and child playtime, etc
- Low maintenance burden
- A rain garden, probably
- Lilac bushes (they’re my favorite flower)
We also had some site-specific constraints and issues to address. Most of these were revealed during the observation period.
- The thin strip between the garage and alley was full of weeds and in bad condition, being an especially tough site.
- Much of the lawn was lumpy and uneven. Some areas had pretty good grass, but others were very weedy and/or patchy.
- Since the yard is level with the public sidewalk, it feels very weird if there isn’t something to delineate the border.
- The back of the lot, near the alley, was neglected and in terrible condition. The soil was so compacted that nothing would grow there until it was improved. Drainage was also very poor and it would remain very wet for a long time after rains.
These lists provided a reference point I could return to at any time during the later stages of planning. When considering a potential design, it’s often hard to decide “is this a good plan?” It can be much easier to answer when reframed as “does this plan meet the criteria I laid out as important to me?”
Zones
One common permaculture planning tool is “zones” (not to be confused with plant hardiness zones, which are a different thing entirely). Zones are a framework for thinking about how location affects the manner and frequency of our interactions with a space, and planning our land use to be compatible with these factors. Things that we use often, or that require frequent attention, should be located in areas that are easy to access and that we frequently visit. Areas that are further from the house or harder to access will be visited less often, and are harder to supply with resources like water or compost. We should use these areas for things that require fewer inputs and can take care of themselves without frequent weeding or other maintenance.
The canonical 5-zone framework is oriented towards larger tracts of land, like rural homesteads, and so many of the specifics are not as relevant to urban areas. A city lot is unlikely to have zones 3 through 5 (farming, forage, and wilderness) located within its boundaries. However, the general concepts are still a useful tool for planning an urban space. Our yard very much has areas that are easier or harder to access, and visited more or less frequently.
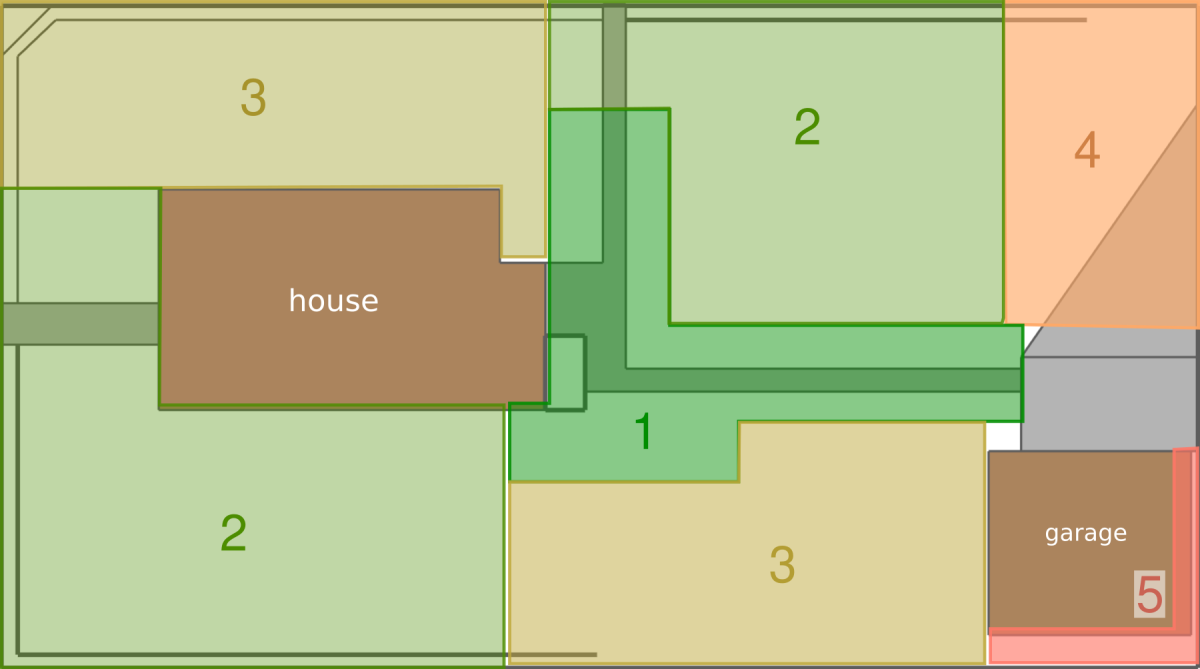
Our lot mapped with micro-scale zone designations.
The back of the lot, for example, is far enough from the house that most hoses don’t reach. This means it’s a nuisance to water it, and therefore it will not be watered very often. We also don’t pass through that area on the way to or from anywhere else, and we don’t spend time in that area to relax or work. When planning what to do with it, I looked specifically for things that were resilient and largely self-sufficient. While that area was a potential site for the vegetable garden in terms of size and sun, I knew relatively high-maintenance vegetables were something that should go in a closer zone if possible.
The strip between the alley and garage is even further out, zone-wise. Not only is it far from the house, it’s completely out of sight from almost everywhere in the house and yard. Out of sight, out of mind! Therefore, my top criteria for any use of that site was that it had to succeed under severe neglect.
The closest zone in our lot is probably the area right outside the back door. This is very close to the kitchen, and we pass through multiple times per day on the way to the garage, driveway, or out for walks. This would be an ideal site for herbs and other plants that need frequent access or attention, but unfortunately this area is also heavily shaded by the white pines, so most options would not do well there. I would compromise on these things and put them in a location that wasn’t quite as frequently visited but provided much better growing conditions. Zones aren’t the final word, but rather a useful tool to be used as part of a toolkit.
Sectors
Another planning tool described in Edible Forest Gardens is “sectors” and “flows”. While these are commonly described in terms of directional forces, I think the real power of the technique lies in giving shape and location to various invisible aspects of a site. When we create maps, they tend to identify tangible things: here’s the dimensions of the house, here’s the path, here’s some trees, here’s a hill. But where does the sun shine in winter? Which views are desirable or undesirable? What enters the site from neighboring areas—wildlife, odors, light, seeds, pollution?
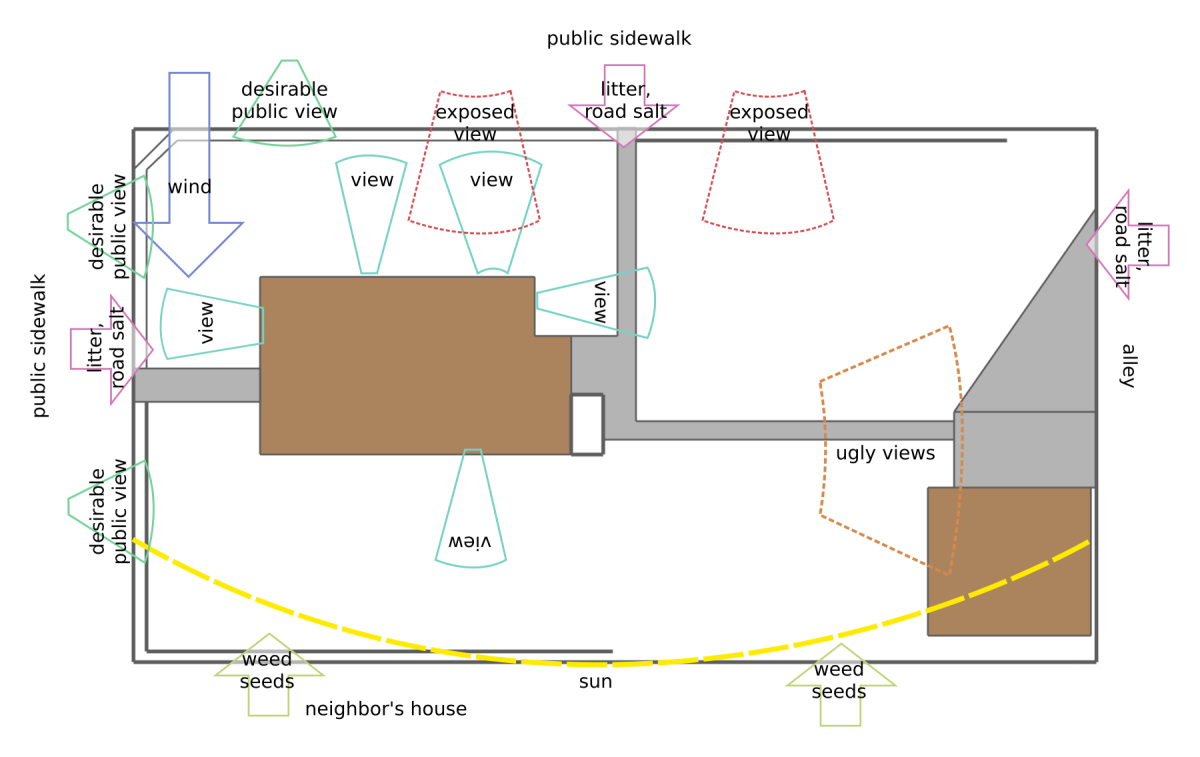
A sector-ish analysis applied to our lot.
Thinking in terms of sectors helped me distill a bunch of observations about our site into a concise and useful format that could be used alongside other maps to inform my decisions. Some key takeaways for us were:
- Several windows on the first floor of the house look out onto sections of the yard, and we would like those to be nice views of some sort.
- Our north-facing windows are close to the street, and with only empty space between the house and the sidewalk, it made our dining room feel exposed to people walking past. It would be nice to have something to partially screen the view.
- The wind can really rip across parts of the lot. The worst seems to be north winds traveling across the front yard. These are not only unpleasant, but prove destructive at times, knocking over crops and causing other minor damage.
- The alley is not a charming view and would do well to be screened. The garage is also not a great view.
- We only have one immediate next-door neighbor, who is quiet and easy to get along with. We don’t need major screening in that direction, though something to slow down the entry of weed seeds might be nice.
- The house gets limited sun in the winter, so we should not do anything to further limit that.
- Due to the corner lot, we have a lot of interface with the public sidewalks and roads. This gives our yard a lot of potential to be appreciated from the outside as well as from the inside.
Sun surveys
I’ll probably do a more in-depth post on sun surveys at some point. Since sunlight is one of the most important factors to plants’ success, it’s very valuable to know how much sun an area receives when you are deciding what to plant.
My early sun surveying was done informally by simply paying attention and mentally noting where sun and shade fell throughout the 2017 growing season. Later, I would do the process more formally by systematically photographing the yard over the course of the day to document the sun and shade. This latter method took more work and planning, but offers much more exact detail, which is useful in more precise planning. The informal method was good enough for my initial needs of delineating the yard into general areas.
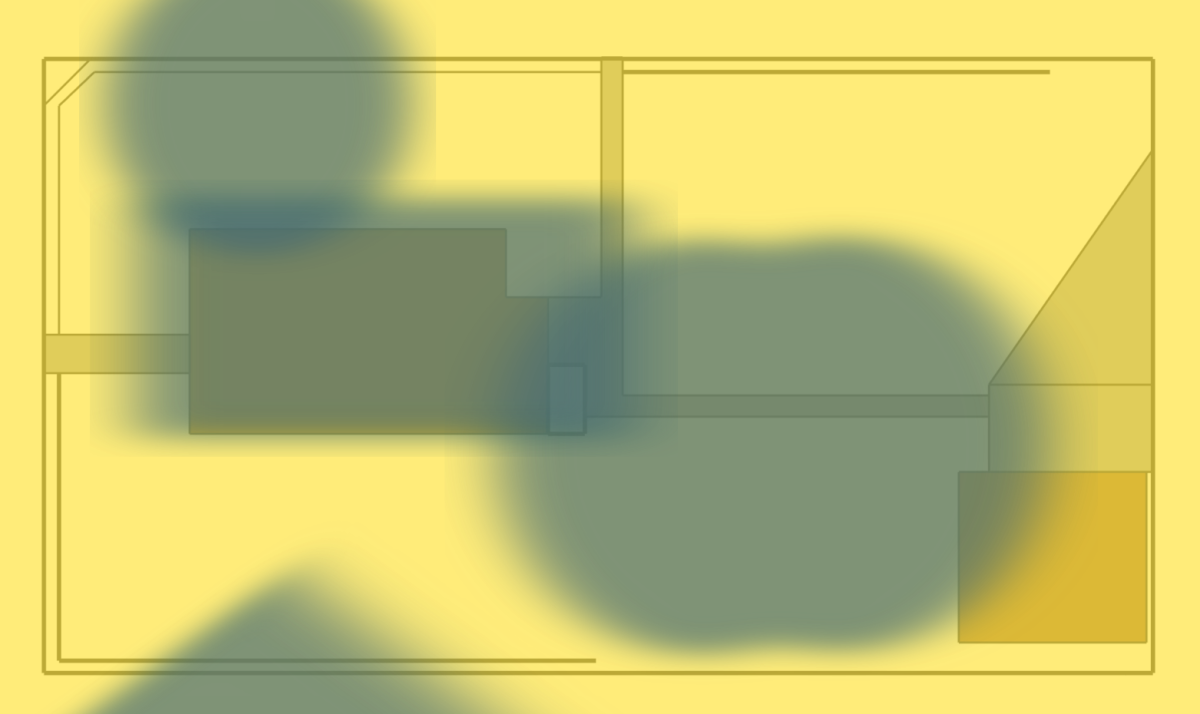
A very rough estimate of sun and shade on our lot. I didn't use this during planning, it's just for your edification.
The sun data was vital to deciding where to place the vegetable garden. In order to get the best production out of many types of vegetables, I needed to make sure it was located in “full sun” (6+ hours of sun per day). I would also use sun information heavily when planning other plantings, like the rain garden. The area selected for that has a mixture of different sun types, so when designing I selected a variety of different natives and made sure to locate each plant somewhere with conditions that suited it.
Sun is important to humans as well as plants. I considered sun conditions carefully when selecting the areas that would be maintained for leisure. Katherine especially likes to bask in the hot sun like a lizard, so I made sure to accommodate her needs with several spots for relaxing that receive sun at different times of the day. Since it’s sometimes more comfortable to be in the shade, I was also careful to leave several spots that allow for that. Thanks to the placement of the house and some large trees, these spots change roles over the course of the day, so an area that was sunny in the morning will be shaded by afternoon, while another area that was shaded in the morning is now in sun. This gives us a lot of flexibility and encourages us to be outside as much as possible.
Here’s the plan
Going through these exercises, in combination with a lot of time to simply look at our yard and think about it, helped me through my decision paralysis. With all this information distilled into discrete lists of attributes, I could start piecing combinations together like a logic puzzle. Some areas had specific problems that needed solving, and so should host something that solved that problem. Some of the features I wanted to add had specific placement needs, and so those would get first priority on suitable sites.
I realized that given the size of our yard and the wide variety of features I wanted, the easiest way to develop a sensible plan would be to break the yard up into several broad areas, each with their own theme.
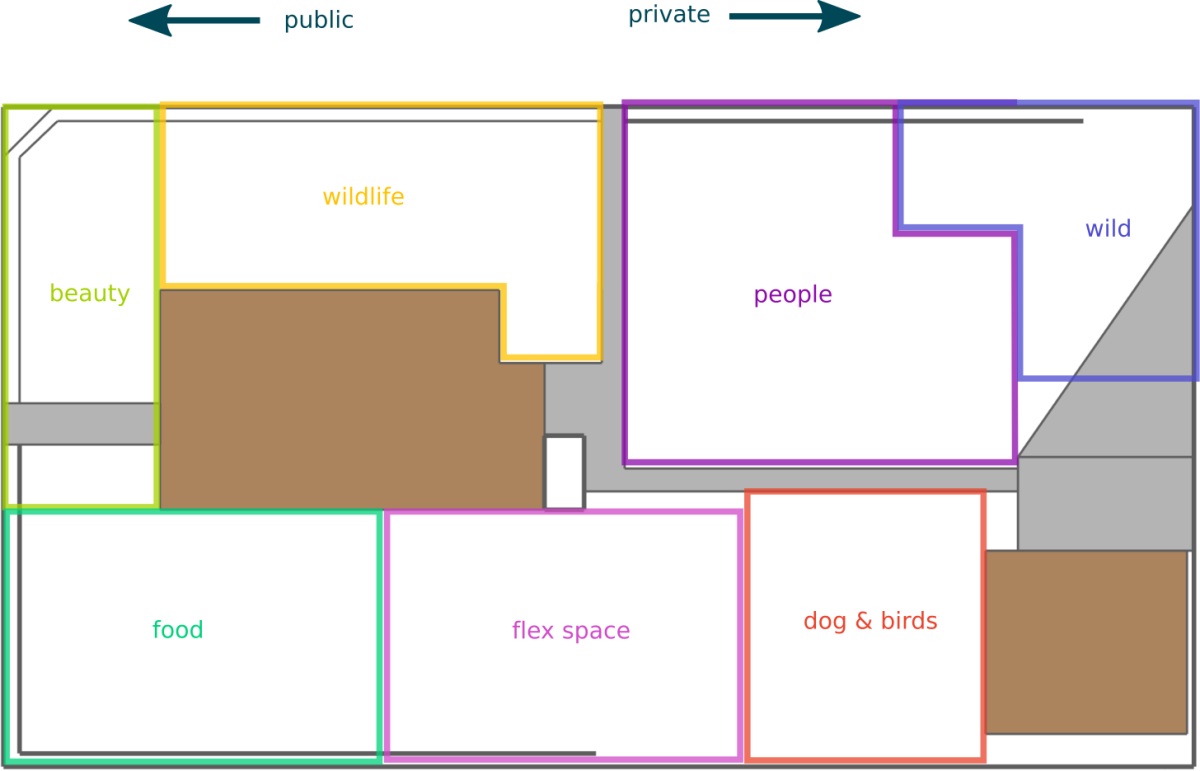
The southwest corner got a “food production” theme and would host the vegetable garden. Sub-themes for this area were “beneficial insects”, because insects are useful to food plots for pollination and pest control, and “visually interesting”, because it is situated at the front of the lot and should be pleasant for us to look at from the porch and passersby to look at from the sidewalk.
The north side of the house got a “wildlife” theme. There is a fair amount of space there, but we were never likely to spend much time there ourselves, so it made sense to set it aside for the benefit of insects and birds. I knew this theme would lend itself well to low-maintenance plantings, which was a definite plus for this area (despite being close to the house, it’s not particularly close to either door, and it’s a bit hard to reach with a hose). Other considerations for this area were that we wanted beautiful views out of our windows, and we wanted some tall plantings along the sidewalk to partially screen the house. Both of these would fit well with wildlife plantings.
East of the house got a “people” theme. This is where we spend the most time hanging out in the yard, and where we host gatherings, play games, etc. This was the area most likely to remain partially turfgrass, though I planned to add some borders to provide beauty and partial screening.
The northeast corner got a “wild” theme. This area was furthest from the house and any sidewalk and thus needed things that could mostly fend for themselves. Because of its position, it could afford to be a bit unruly without inconveniencing anyone. It also had some serious soil quality problems that made it unsuitable for more delicate plants, lacking a major intervention. Since this space wasn’t in high demand for anything else, I knew it would be an excellent place for some of the bigger features I wanted to add, like fruit trees. The extended timeline of establishing a “food forest” would work well here. Trees would eventually fill in most of the space, but while they were small I could grow other things around them to hold off the weeds and improve the soil.
West of the house got a “beauty” theme. In particular, I wanted some part of the yard to have excellent winter interest, and with this area bordering the sidewalk and visible from our front picture window, it seemed like a good place. Had I been working with a smaller yard, I could have folded the “beauty” theme into the other themes with some clever plant placement, but because I had plenty of space to work with, I felt I was able to give it a dedicated space. As I got into more detail on what exactly I would plant, this theme morphed into “woodland beauty”. This blended well with the bordering “wildlife” area, extending the wildlife zone further and giving the whole side yard a naturalistic landscaping feel.
The south side of the house just had a “flex” theme, which meant I wasn’t sure what we’d do with it and would keep our options open for now. The first-year garden was there, so the conversion of that into prairie would augment the pollinator needs of the neighboring food production area.
The southeast corner got a loose “dog & birds” theme, which was more a descriptive label based on its current use. I didn’t have a strong vision for how to use that area and figuring it out was not a high priority. This part of the yard is dominated by the two giant white pines, so they drove a lot of the use. The grass wasn’t doing well in their heavy shade, so I’d get rid of that and plant something more appropriate. We’d have some wood chips and hopefully get the dog to do most of her bathroom business over there. The trees already attracted a lot of bird activity, so maybe we’d add some feeders or birdhouses to augment that. This is also the best shade from hot midday sun, so we’d leave some area for us to use on days where we needed some relief.
We’re just getting started
This macro-level plan seems so straightforward in hindsight, but reaching this point felt like the hardest part of the process. With my themed areas as the guiding document, the rest of the design seemed to flow naturally out of it. That’s not to say I didn’t have a ton of work still ahead of me, though. I had a lot of research and designing left to do, which we’ll cover in part two.