We’ll start this blog with the first true project we tackled after moving in: the garage. This was an obvious place for us to start because it felt like a very doable entry point, and because it was pretty urgent. Why? Let’s review.
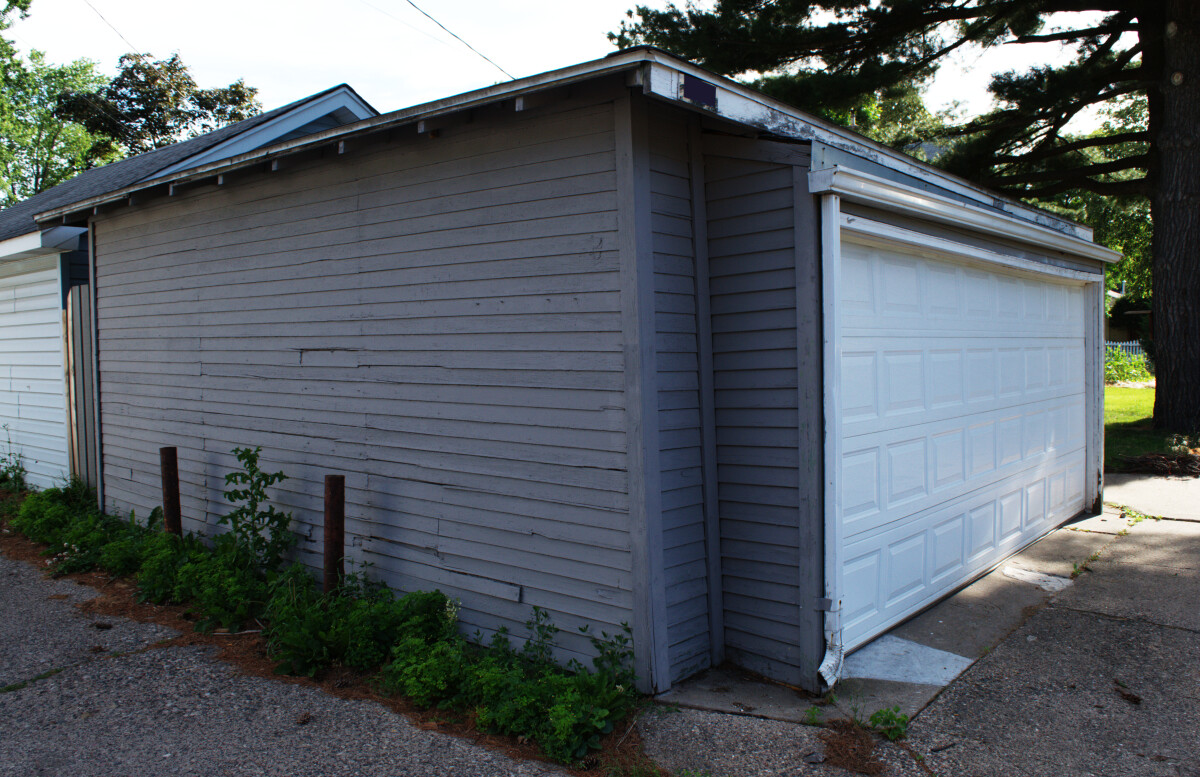
The garage is… not in great shape. It’s as old as the house and not built with the same sort of care as the house. The framing sits directly on the ground, and after a hundred years of ground contact, the wood is in pretty bad shape! Due to this slow loss of structural integrity, the whole thing has a pretty noticeable lean to it. We’ll come back to that later.
In addition to the structural issues, a previous owner had converted a third of the garage into the grimiest of hangout caves. Plastic sheeting had been hung to create a room of sorts and the walls had been partly insulated (more on that in a moment). When we toured, the space was still furnished with a couch, recliner, TV and stereo system, and most concerningly, a wood-burning stove. Truly a four-season hidey-hole. Part of me perversely hoped they would leave behind the stove, but by the time we closed it was gone with only the patched chimney hole to mark where it had been. Probably worth good money.
I wish I had a photo of the cave in its full glory as it was truly a sight to behold. Even photos, though, wouldn’t capture to most distinctive feature of the garage as we got it: the smell. It reeked overpoweringly of cigarette smoke. The smell was so potent I found it truly difficult to spend more than a few seconds in the garage. I would gulp a big breath a few feet from the door and try to hold it until I had gotten what I needed and retreated.
We needed to be able to use the garage, so we needed to address the smell and general grossness. Our best bet seemed to be stripping it as much as we could. The weird slapdash shelves had to go. The haphazard light fixture in the back had to go. And most importantly, the very handmade and smoke-impregnated insulation had to go.
Demo day
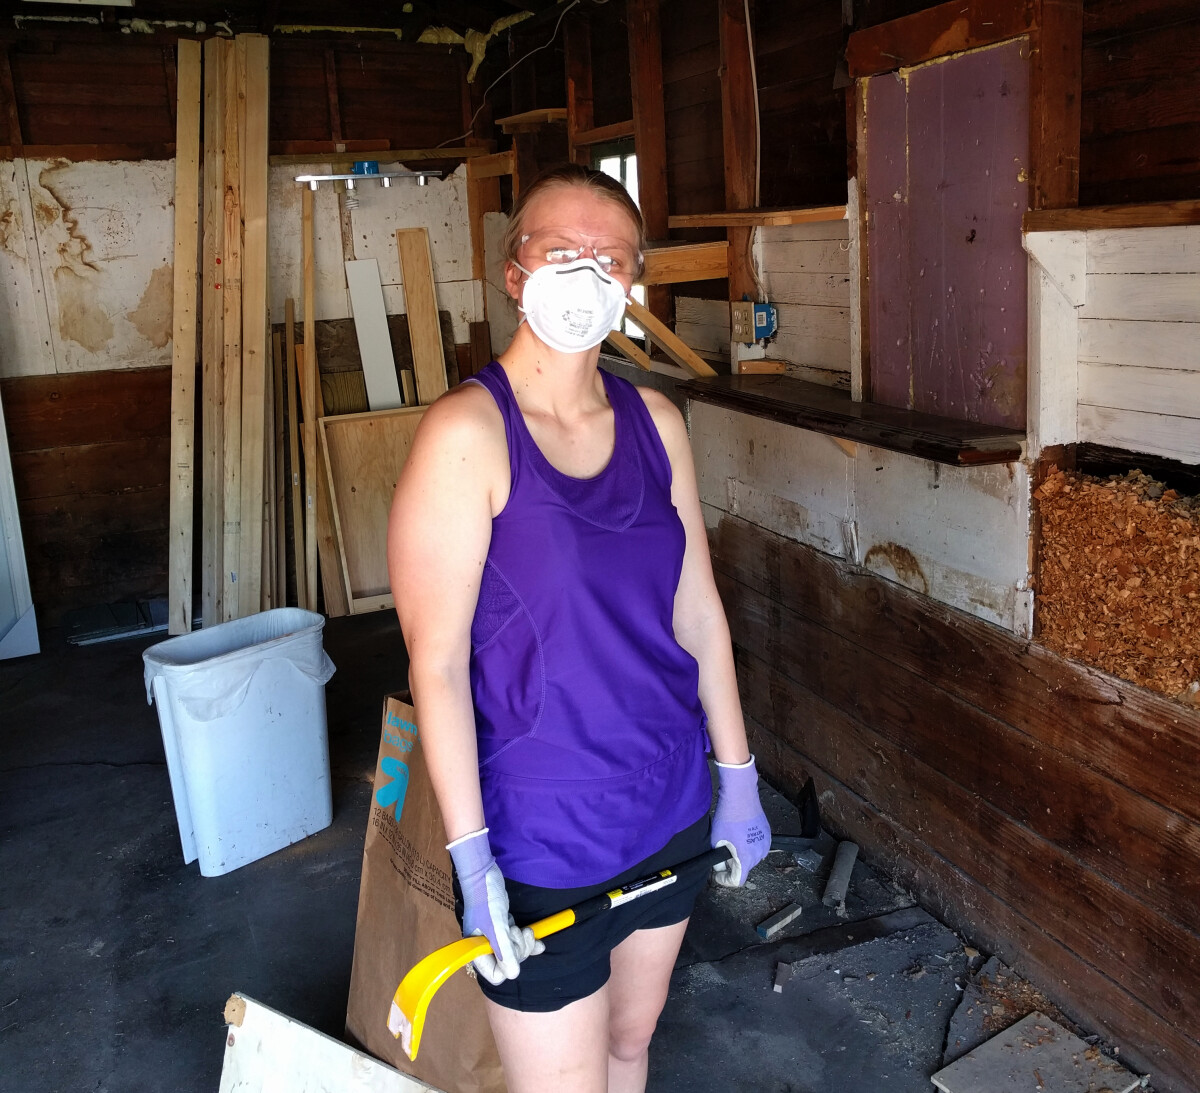
We visited the hardware store for a few basic supplies to prepare: dust masks, trash bags, and most crucially, the biggest crowbar I could find.

This was an excellent purchase.
Most expendable clothing worn, gear donned. It was time, as Monty Don would put it, “to get stuck in”.
Our first surprise was that the wall insulation was entirely wood shavings. It looked like someone with a woodworking hobby had spent some unfathomable number of years collecting the dust and planer shavings and pouring them into the walls. Kind of impressive, but I’d also prefer a structure that isn’t ready to turn into Minneapolis’ biggest bonfire.

Cool. Cool cool cool.
A lot of our time was spent prying off the old planks holding the insulation in and bagging up the wood shavings. The planks I saved and used for temporary garden paths and other scrap purposes. The wood shavings we put on Craigslist and were quickly collected by some nice folks excited to mulch a strawberry bed with them. I probably could have saved them for my own garden, but I was so disgusted by the whole deal that I just wanted them gone.
As an extra fun surprise, some of the insulated sections contained interesting items.
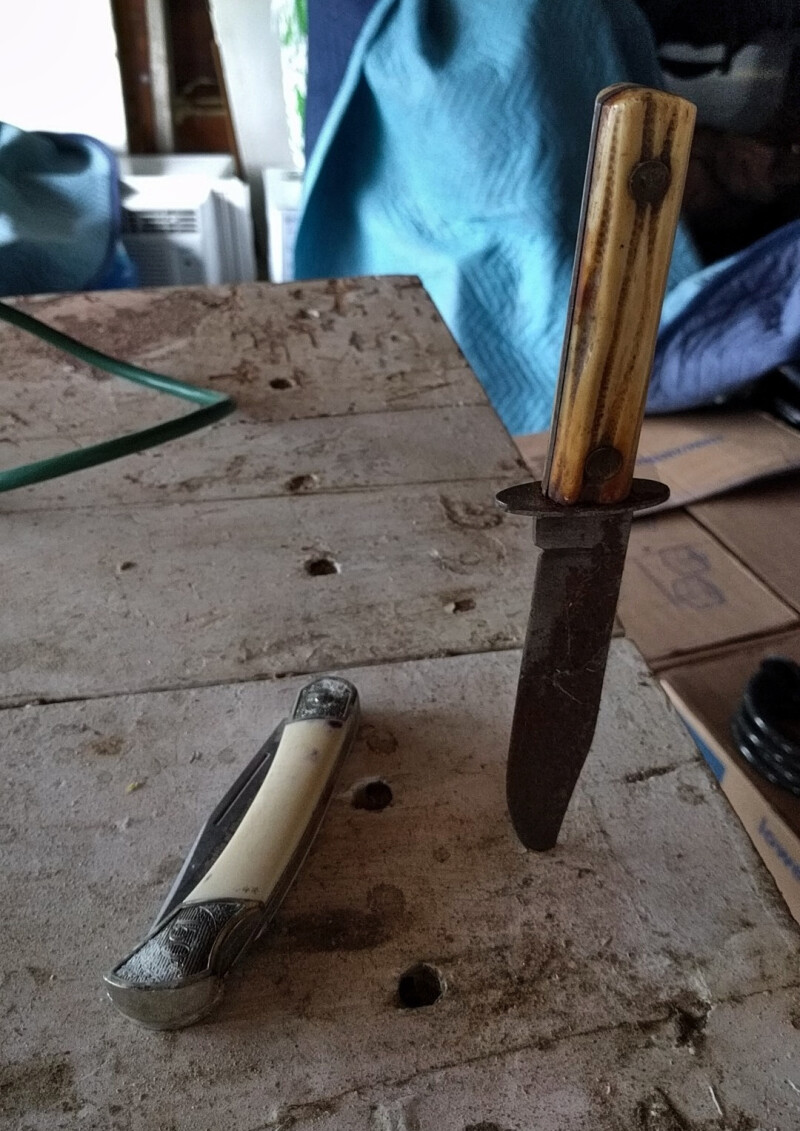
There were two knives buried in the shavings. I’d give it a 40% probability that at least one of these was used in a murder, because why else would you hide knives in the walls of a garage?! The big one is a nice form factor for stabbing into a wood surface. For some reason it annoys Katherine when I leave it like this, so I took to periodically moving it to a different stud in the garage just to keep her on her toes. I suspect she has recently confiscated it and hidden it from me. I’ll find it, though. I’ll find it.
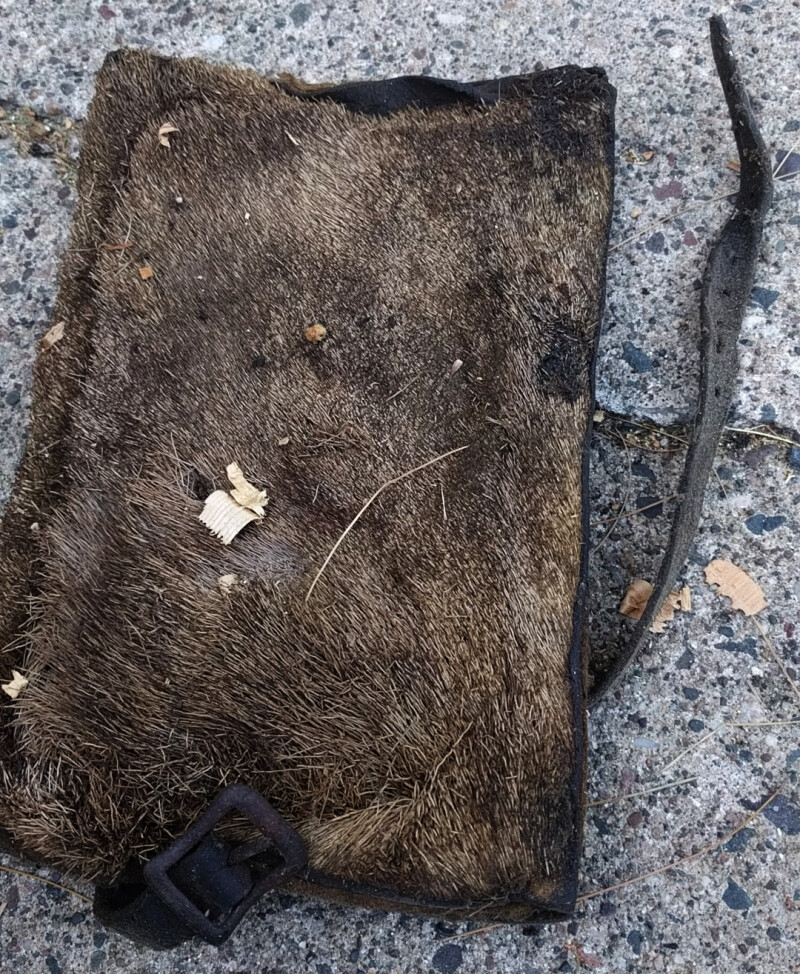
There was also this horrifying patch of… fur and leather? I cannot imagine what this is and I have made a point not to find out.
The only things we kept were the shop lights mounted to the rafters and a battered but sturdy workbench.
With the siding and shelves removed, we pulled most of the stray nails out of the walls, swept out a decade of rubble and cigarette ash, and left the garage door open for a couple days. It worked! The cigarette smell went from overpowering to simply noticeable, and it has since faded completely. Our garage was clear and relatively clean, and we could start using it for our own stuff. If I were smart I would have taken a photo of it at this stage to illustrate for you our perfect minimalist lifestyle. I am not, and we immediately filled it with disorganized piles of our own junk, something which we have still not fully gotten back under control two years later. Oh well.

The mess of shame.
Changing the open-door policy
Before we put anything of value in the garage, though, there was one more issue to address. The service door was what I would describe as “not a real door”.
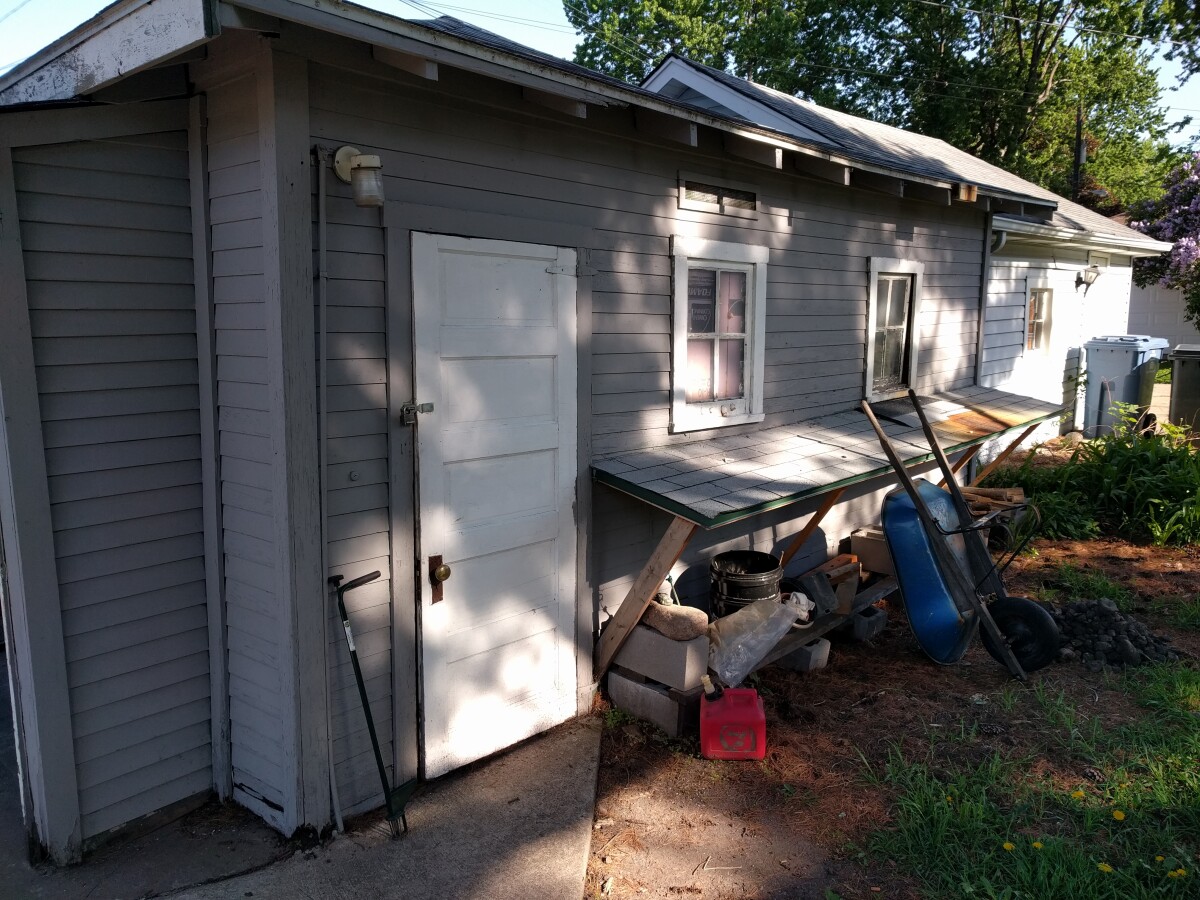
It was definitely an interior door that someone had repurposed at some point. The hinges were on the outside, which would be a security problem if not for the fact that the locking latch was so tenuously attached that I think I probably could have compromised it with my bare hands. Garage break-ins are enough of a problem in South Minneapolis that I did not want to be the easiest garage on the block to break into.
This was going to be a project, though. The door frame was a weird nonstandard size that no door would fit. And remember that lean? Turns out an important tenet of hanging doors is to try to do it on something that is relatively plumb and square. This opening was neither.
It was time to call for backup, namely Jeff my handy father-in-law and his Sawzall. He advised that we buy a standard door and alter the opening to fit, so I found the cheapest metal security door that looked decent, strapped it to the roof of the car in the always-eerily-abandoned parking lot of the West St. Paul Lowes, and drove it home. Jeff came over for a long Saturday in which we pulled out some of the existing framing, cut a larger opening in the siding, added new studs and support beams, and installed the door. It was a precision operation to get it in a place where it would clear both the concrete floor of the garage and the overhead rails for the automatic garage door. After a lot of adjusting and checking and adjusting some more, we got it in and attached and to my great relief, it works well!
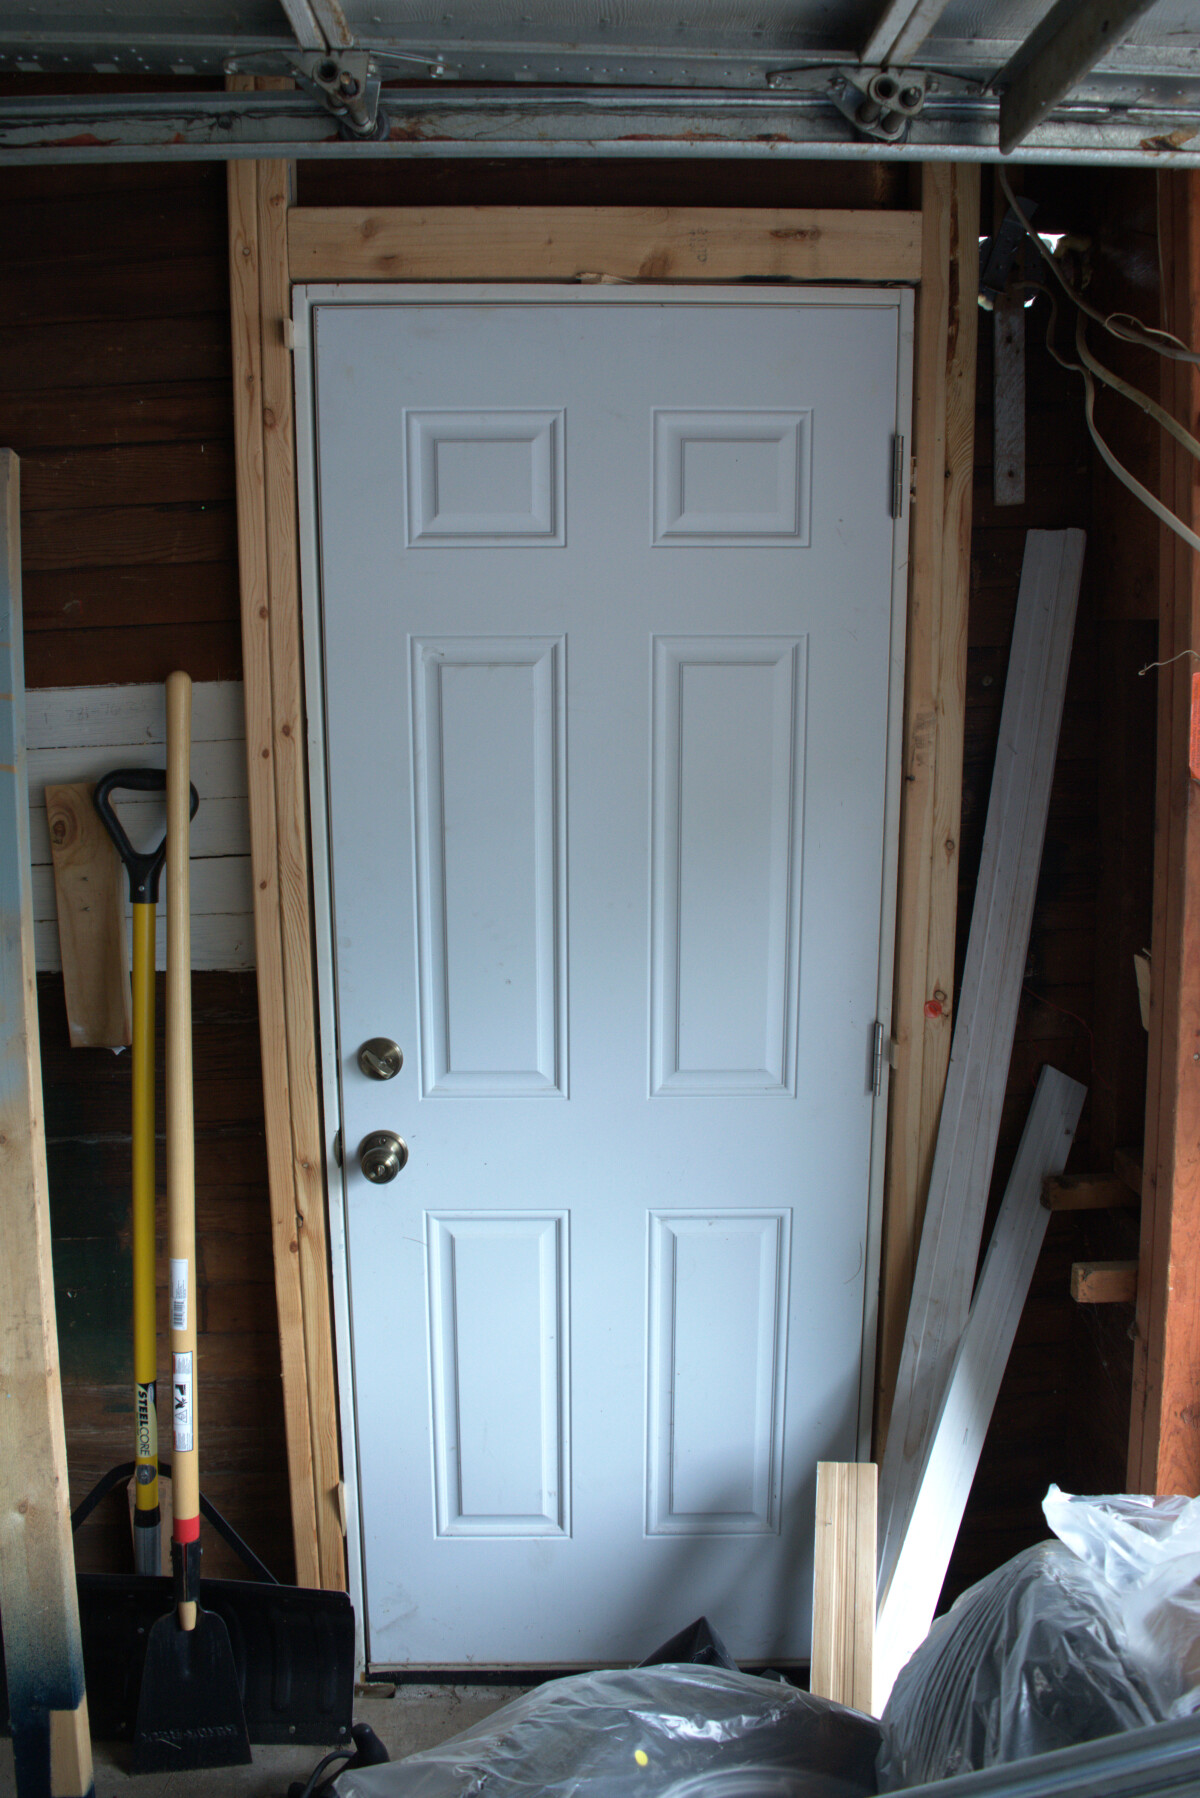
New door, new studs.
Not that it isn’t without its quirks. Remember how I told you about the garage’s pronounced lean? We had a decision on whether to install the door square with the rest of the garage, or plumb with the actual ground. We chose plumb, and I am entirely confident this was the right decision, but this does mean that the door is very obviously out of alignment with the rest of the garage.
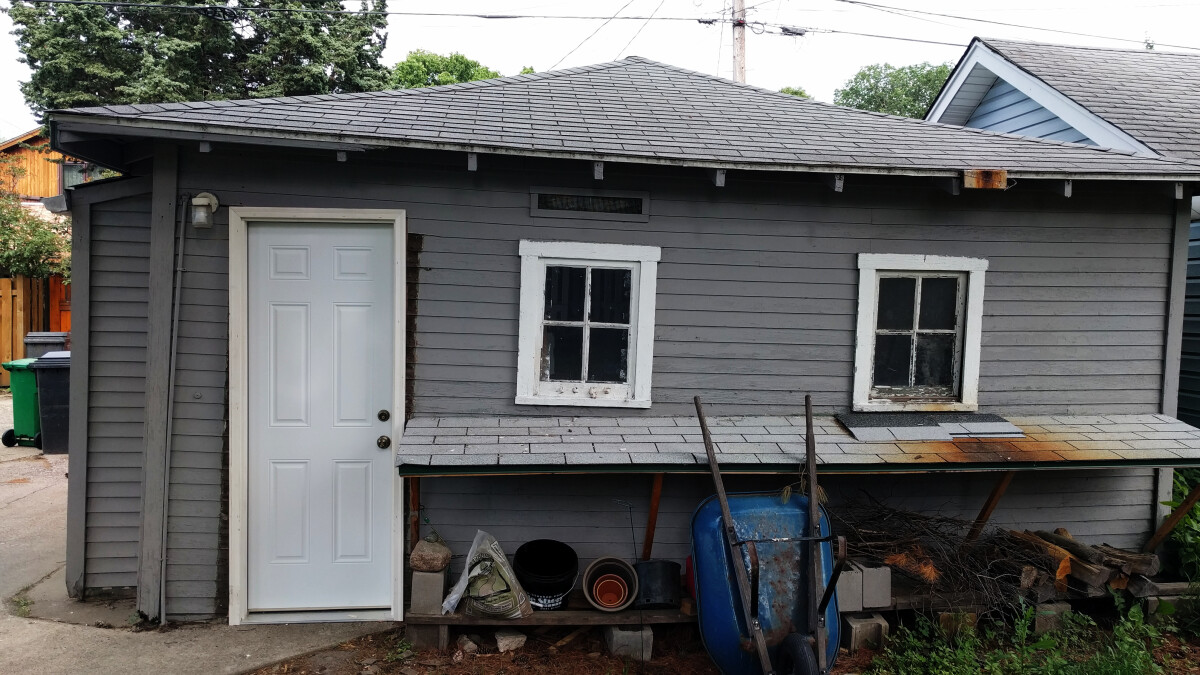
This is not an optical illusion. That's… just how it is.
Having the door there really accentuates just how much the rest of the structure is listing. It’s fine. I’m sure it’s totally fine. Nothing to worry about here.
Sometime later, I finally got around to installing some trim that I bought from our local salvage shop. It looks okay. Go me!
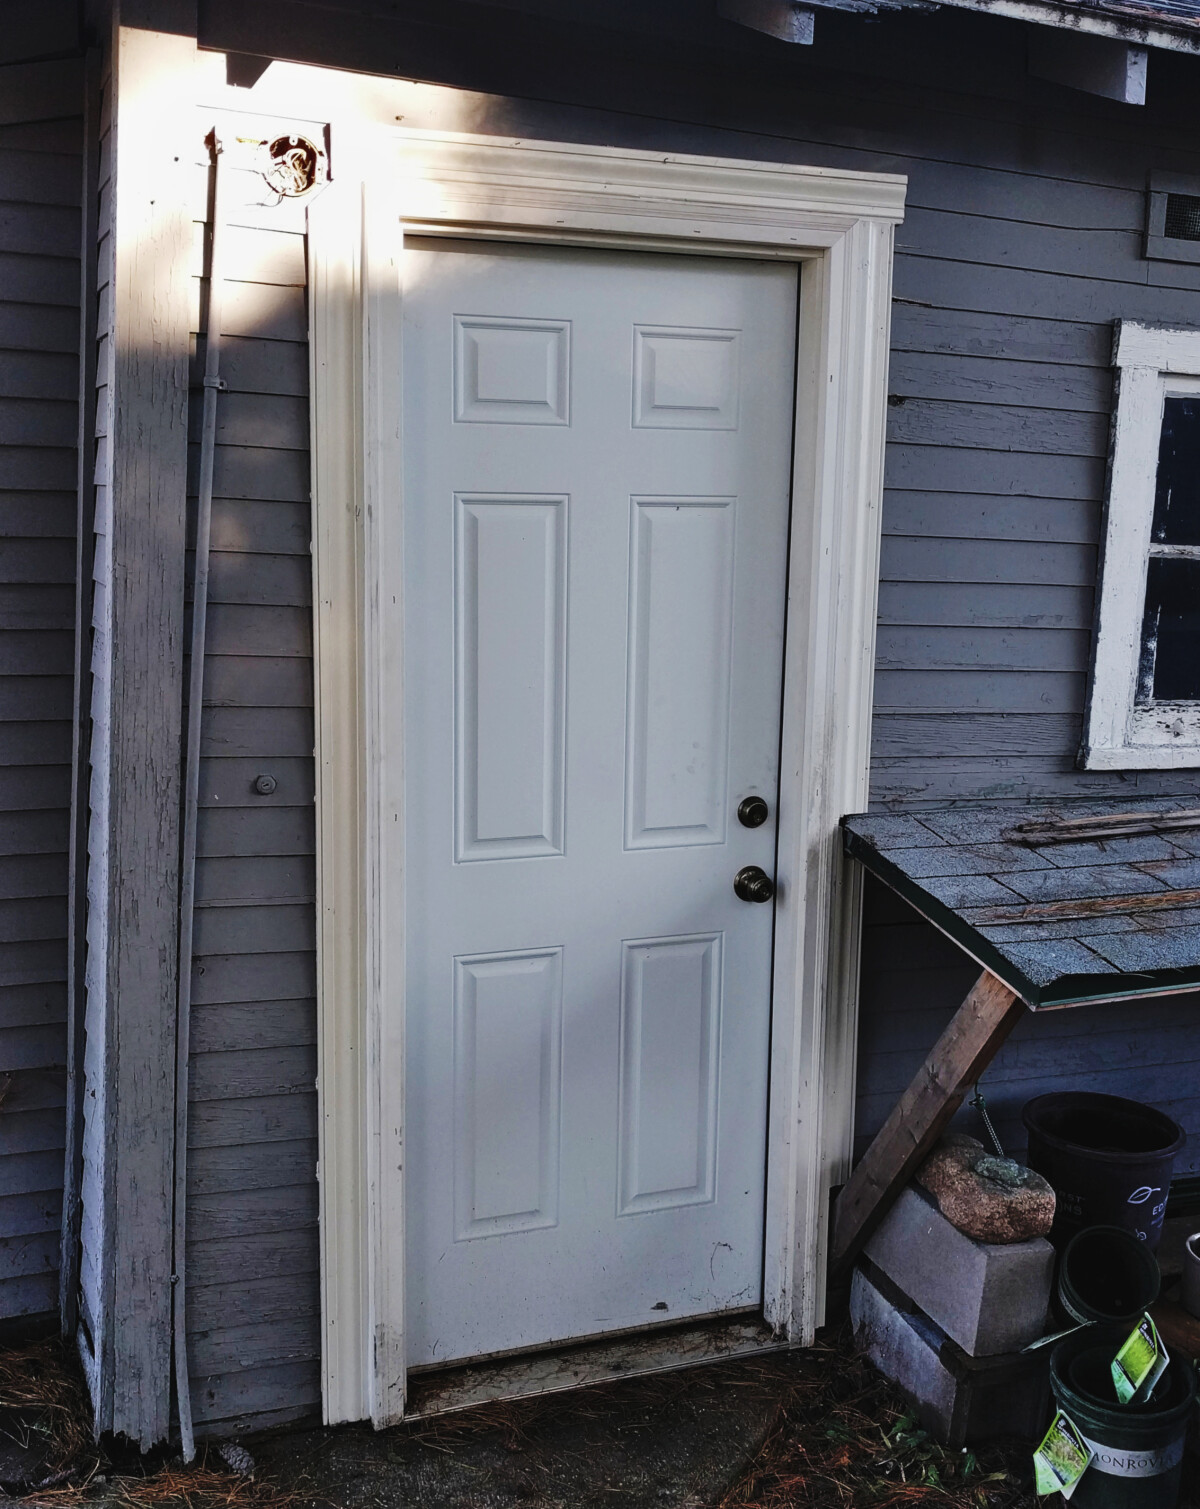
I also eventually installed a security light in place of the old lamp that had been on that electrical box, but it is such an utter hack job that I’m not even going to document it. It’s nice to have a proper light there, though.
Organization
We will be working on organizing the garage for the rest of our lives, plus or minus a couple years. We’ve made some progress, at least, which I will share with you in the spirit of incremental good-enough-ism that permeates this blog.
I bought some 4’x8’ sections of the cheapest pegboard and transported them precariously home on the roof of our Subaru. Next time just buy the 4’x4’ sections, Ian you dummy. Those would be way easier to work with.
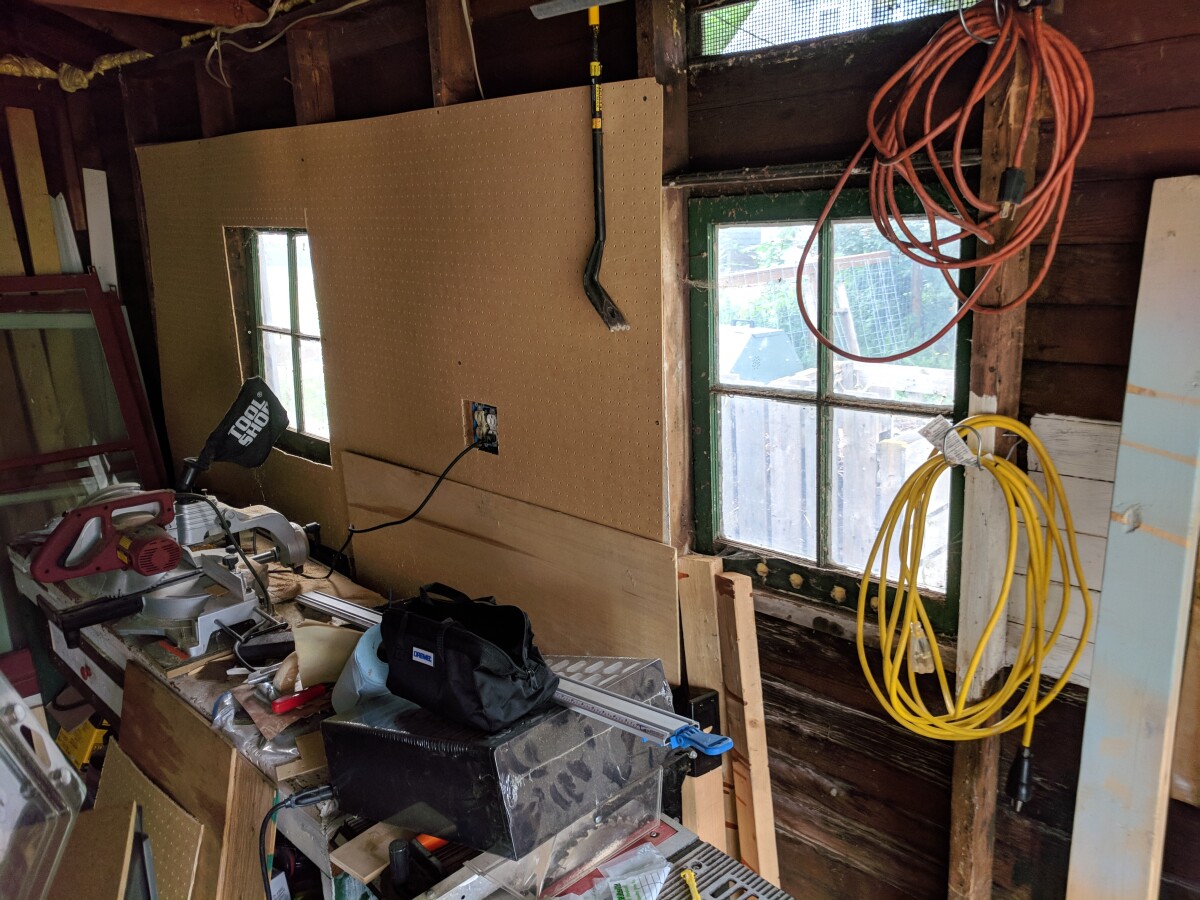
I screwed one panel to the studs on each side of the garage.
Notice the crowbar presiding over its domain.
This one went right over the window and electrical box because I was far too lazy to measure and cut out holes prior to attaching it. Two years later, after purchasing an oscillating multi-tool, I finally got around to cutting these out, totally professionally! This one will probably hold workshop tools, at whatever future date I dig out and organize the workbench so I can use that area as an actual workshop.
The other side holds gardening tools and a few other yard items.
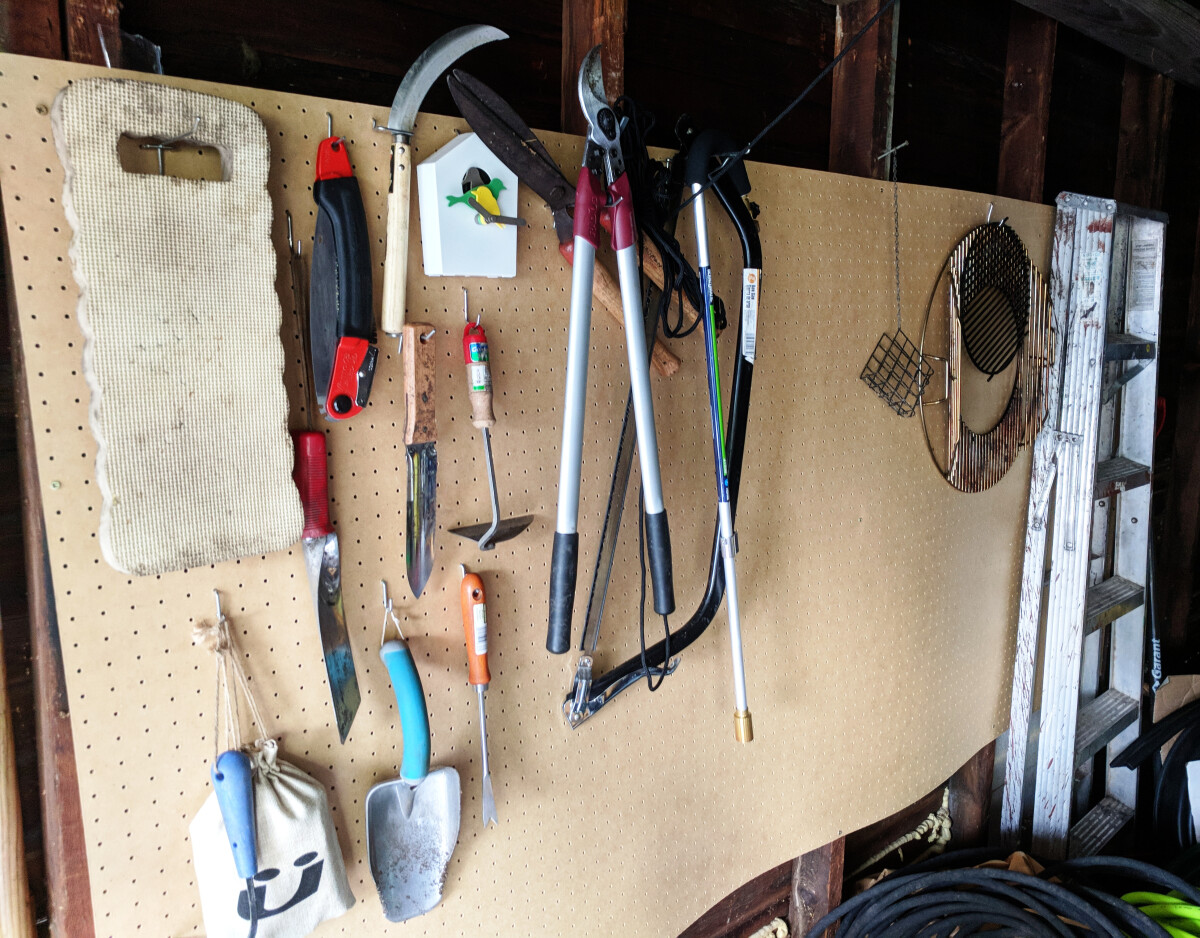
I feel prouder of my organization on the near side of this one.
We started out with this tool rack that my father has been storing in the basement (in original packaging) for presumably several decades.
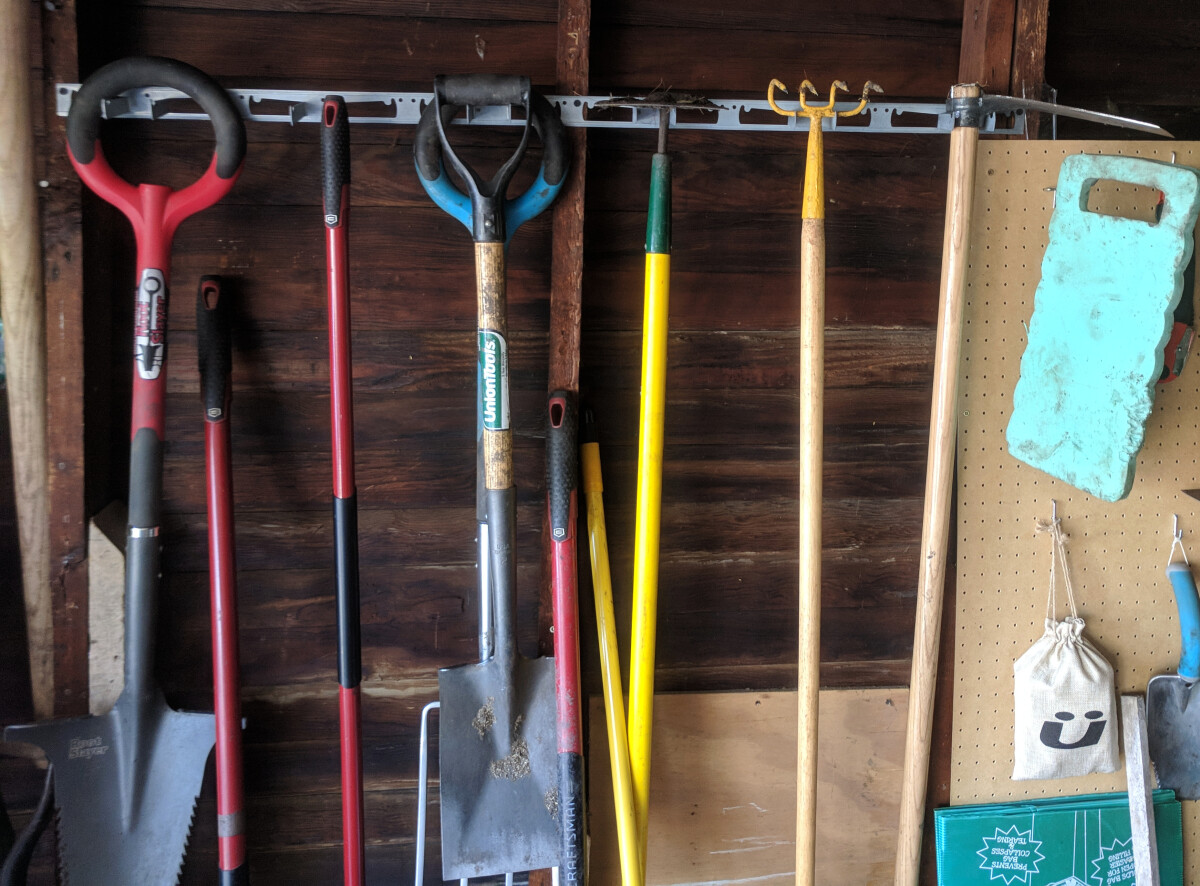
It helped a lot to corral all the larger implements in one place, but the hooks on the rack didn’t work for everything, and it was bending considerably under all the weight. I looked around and found a rack at Home Depot that looked decent and was cheap. One problem: it’s drilled for standard 16” studs, and in the garage the studs are 24” for whatever reason. Am I going to let that stop me? Heck no!
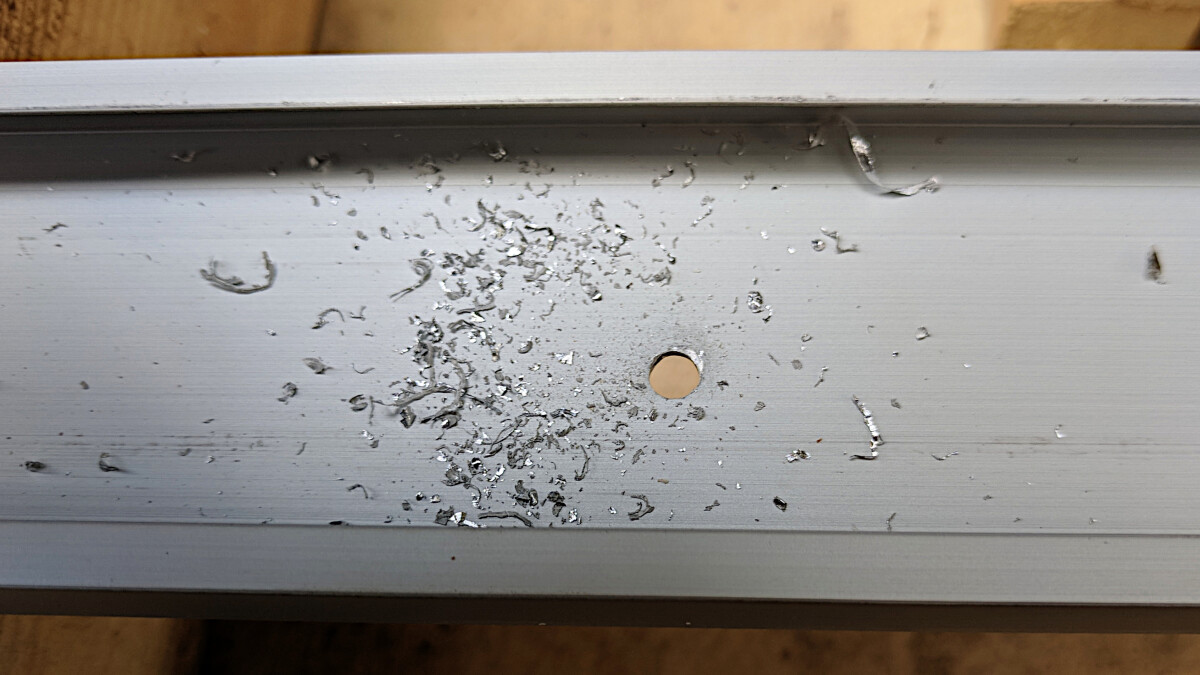
Just drill a new hole.
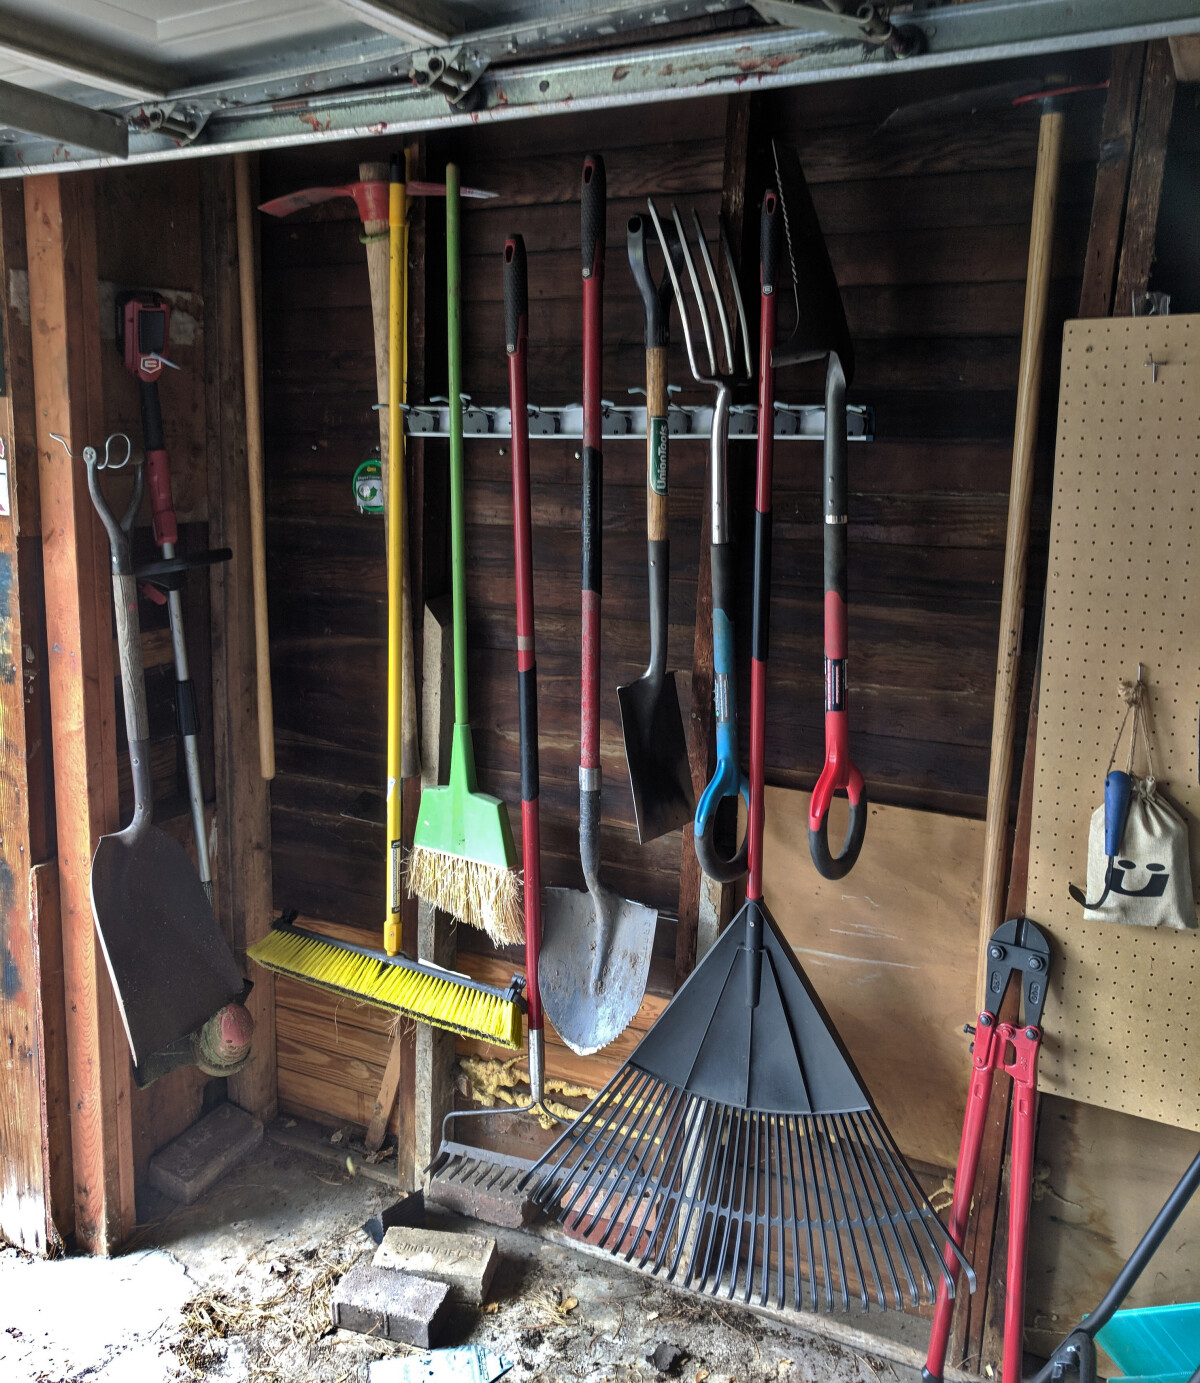
Rack mounted, plus some storage hooks and strategically placed nails for the other tools.
The new rack seems sturdy and the gripper mechanisms hold the tools well. Hopefully it will hold up over time, but even if it doesn’t, it was cheap.
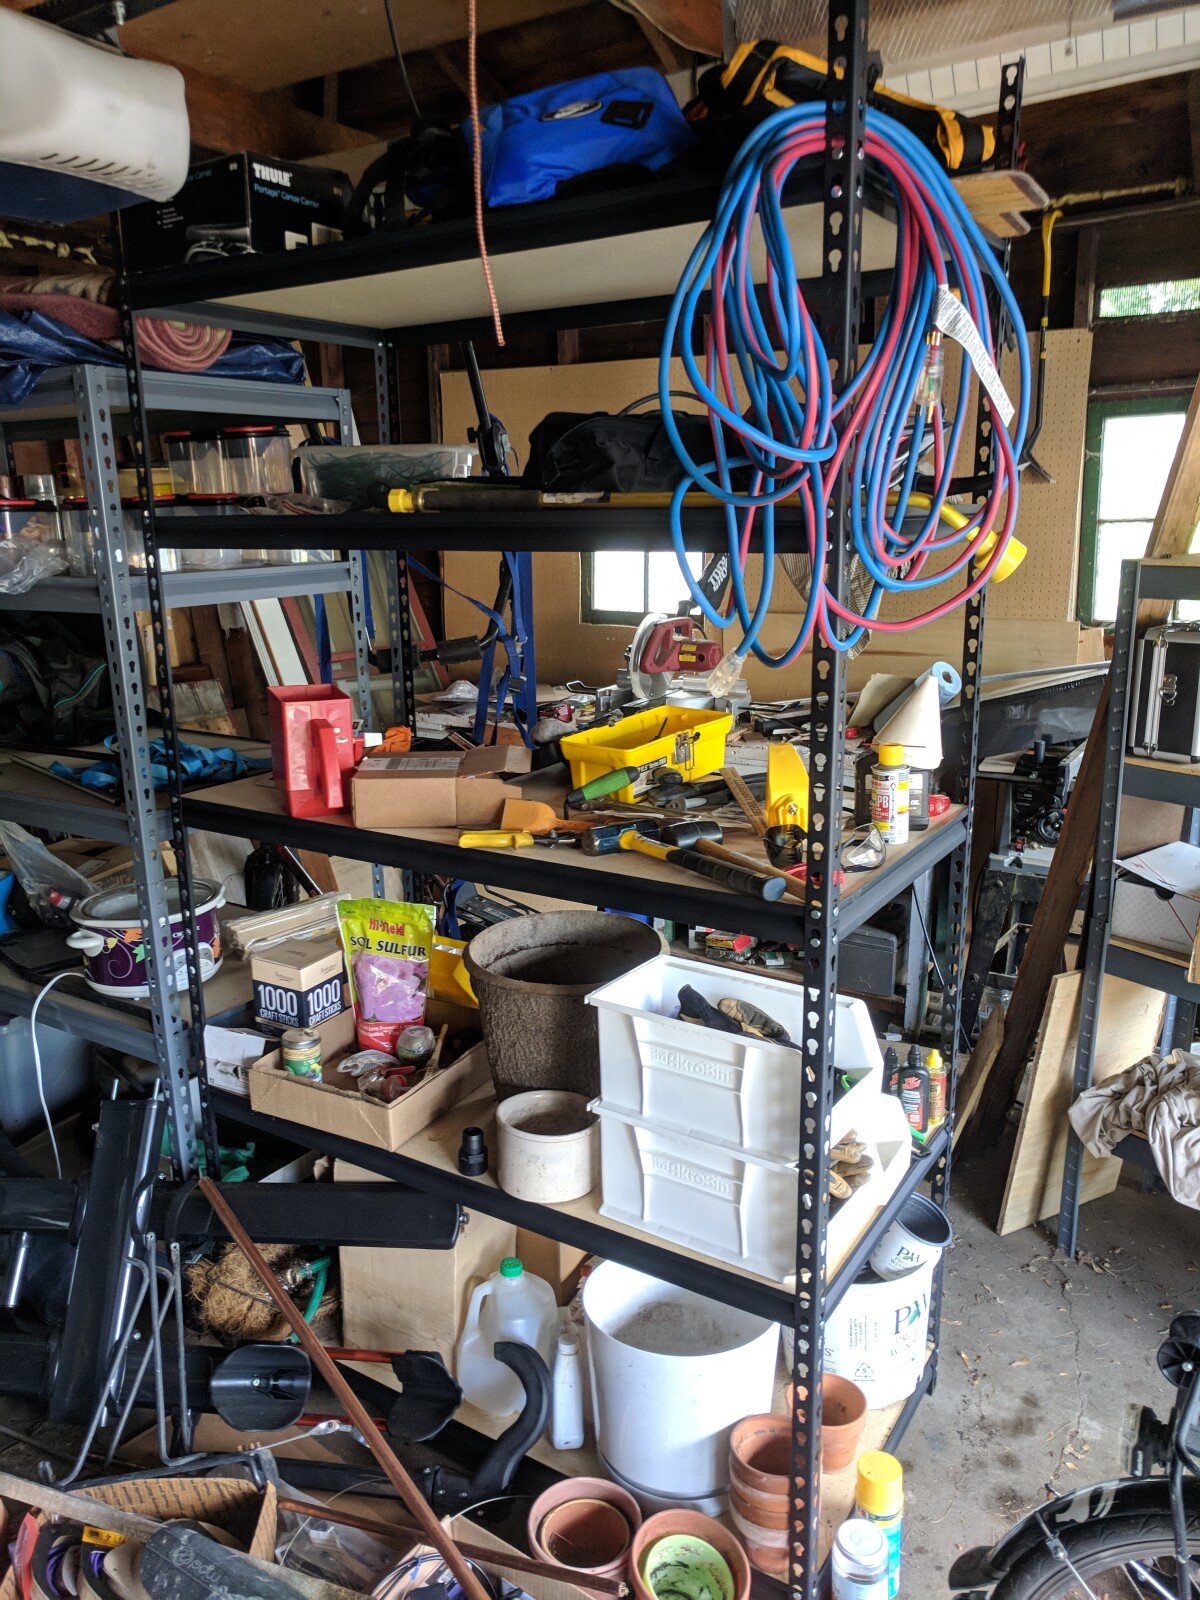
These are Costco’s version of your classic metal storage shelf, and like everything from Costco they are 30% larger than the standard version. Luckily they just barely fit in the space, and give us a lot of space for miscellany.
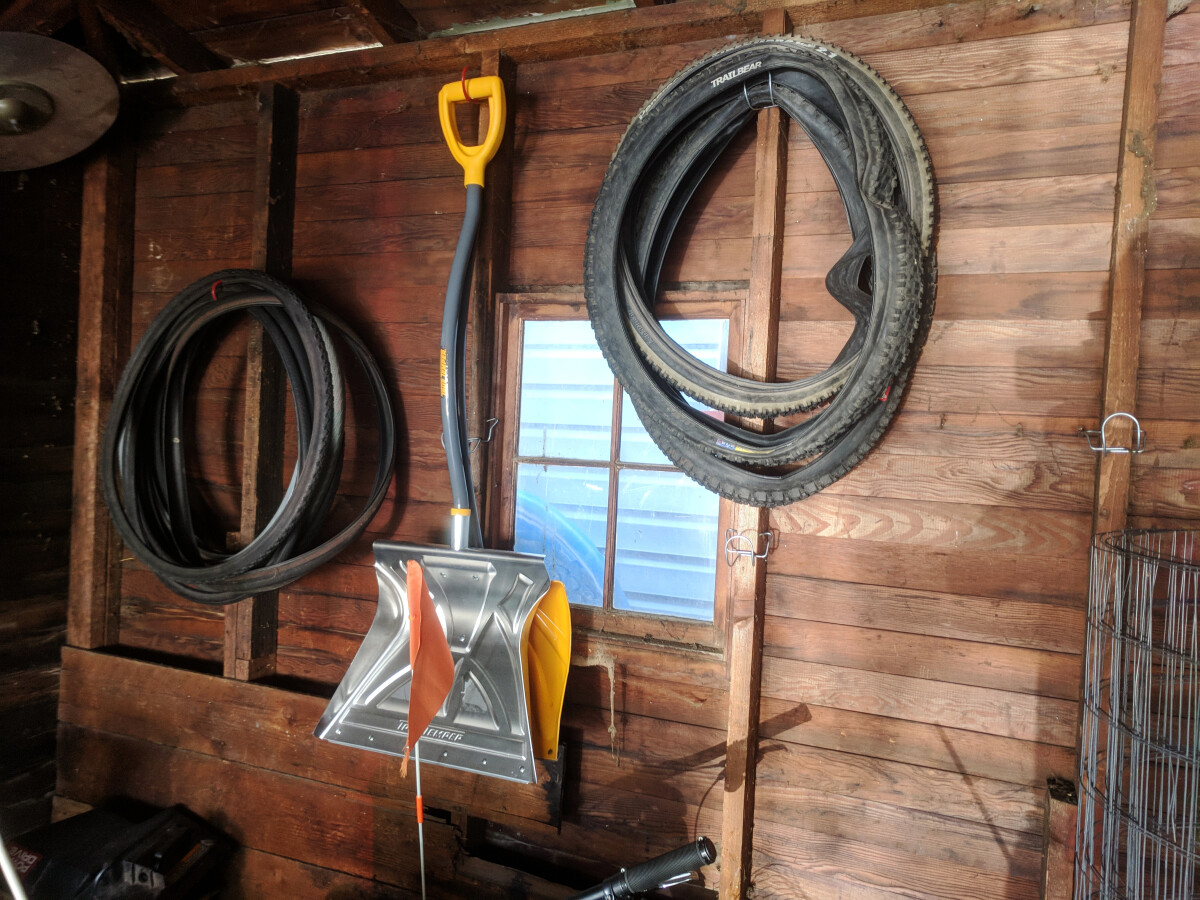
Hooks on the walls hold bike tires, hoses, and cords.
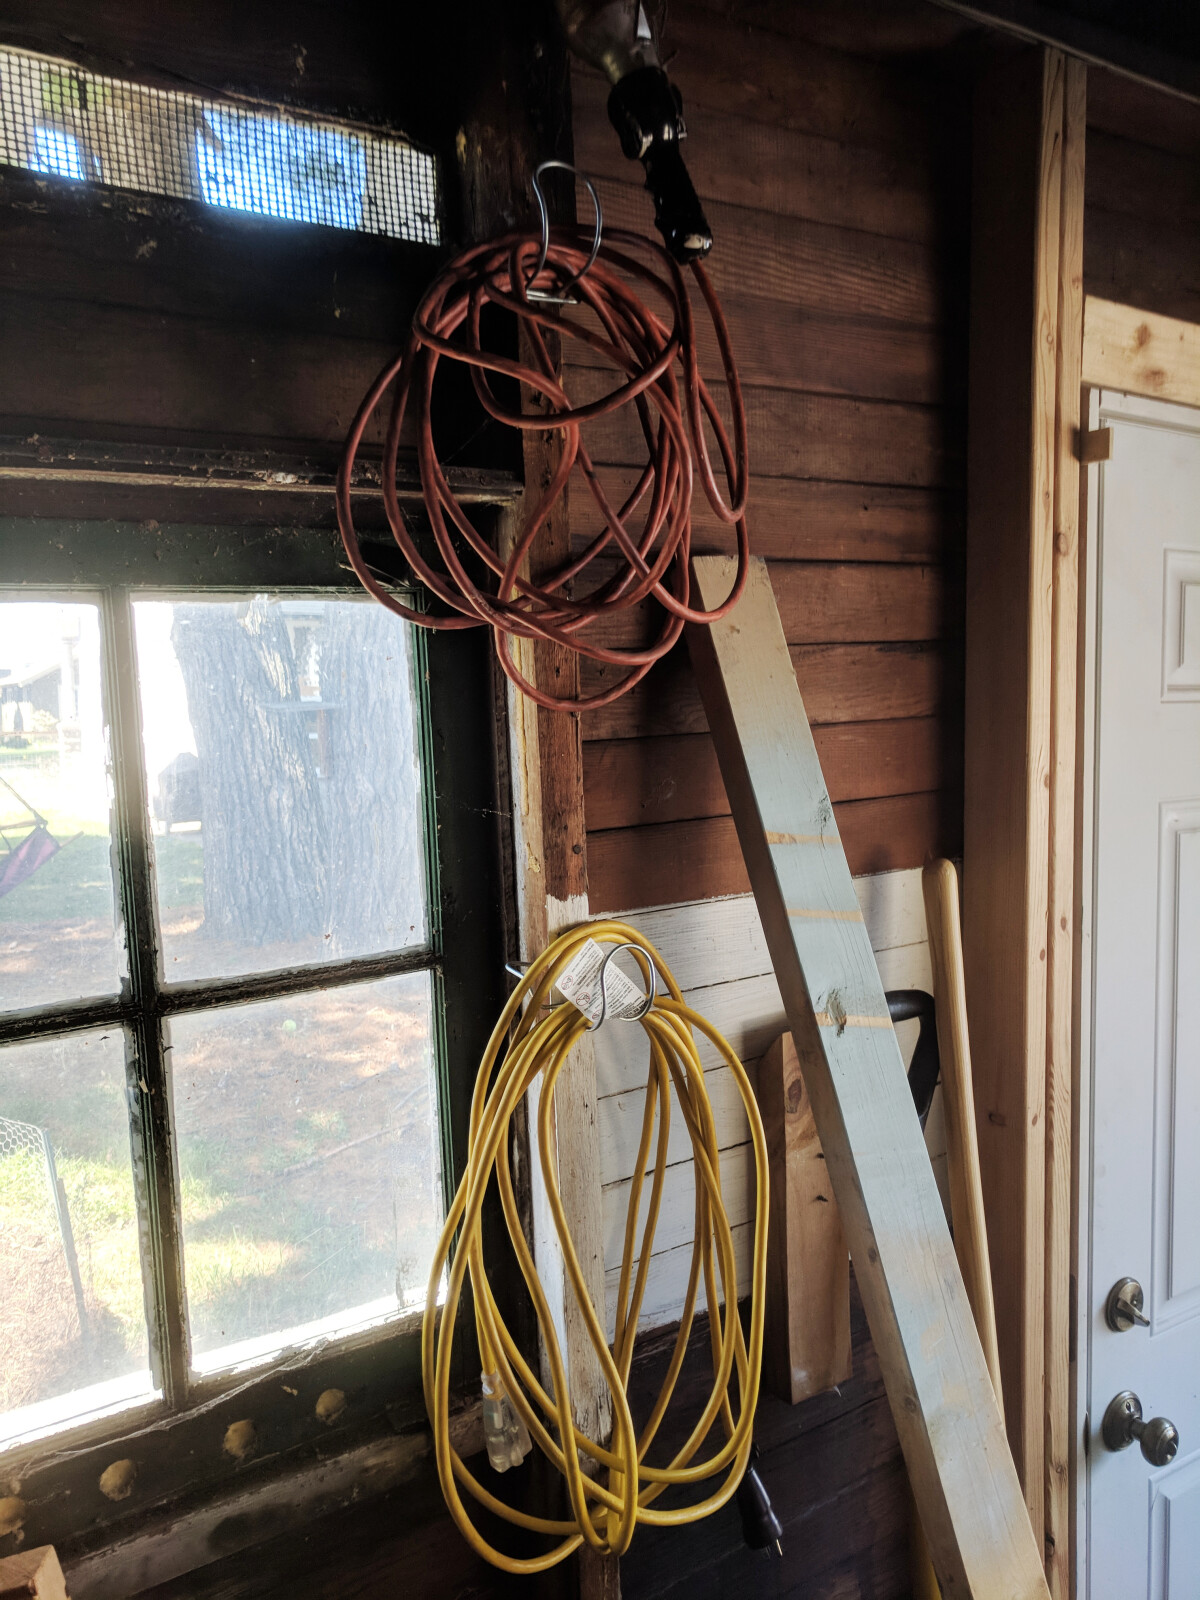
I bought these awesome stud-grabbing hooks from the Grandstand at the State Fair, and I didn’t even mind paying Grandstand pricing because they are so darn nifty.
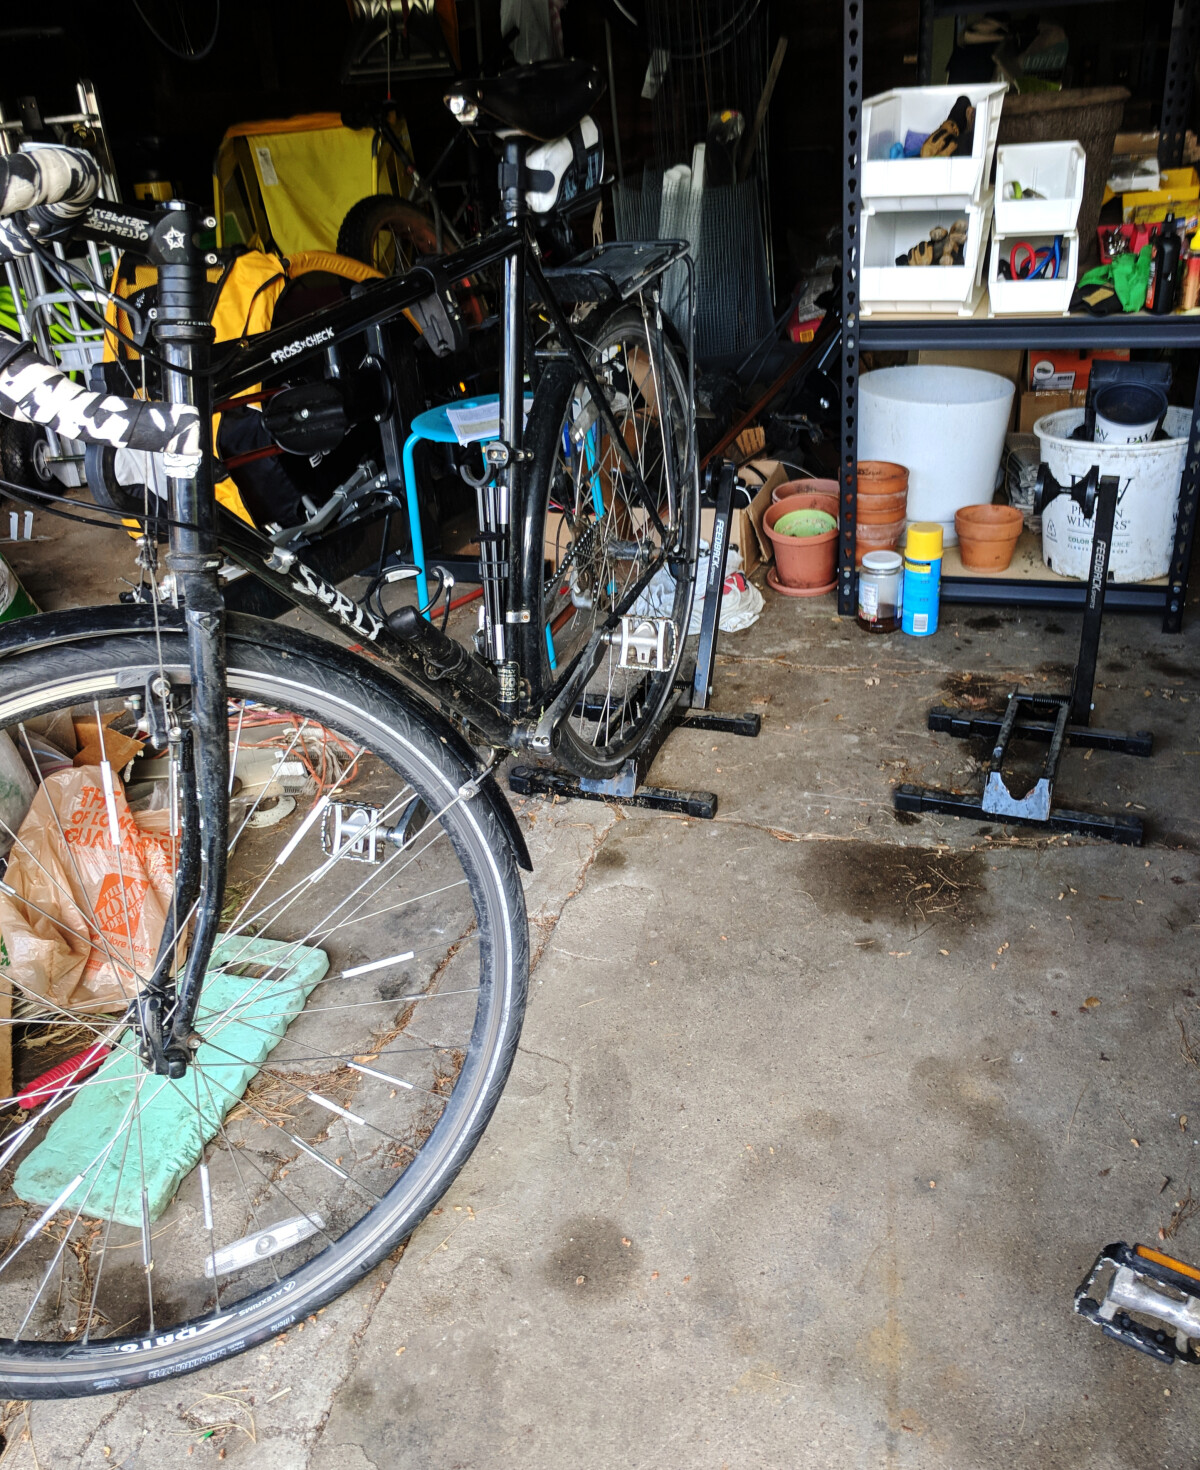
Our everyday-use bikes go in these lovely Feedback Sports stands we’ve had for years. The front of the garage hosts the most frequently-accessed items, like the bikes, tools, wheelbarrow, and lawn mower. The back of the garage is a dark tangled forest of chicken wire and scrap wood. I don’t go back there any more.
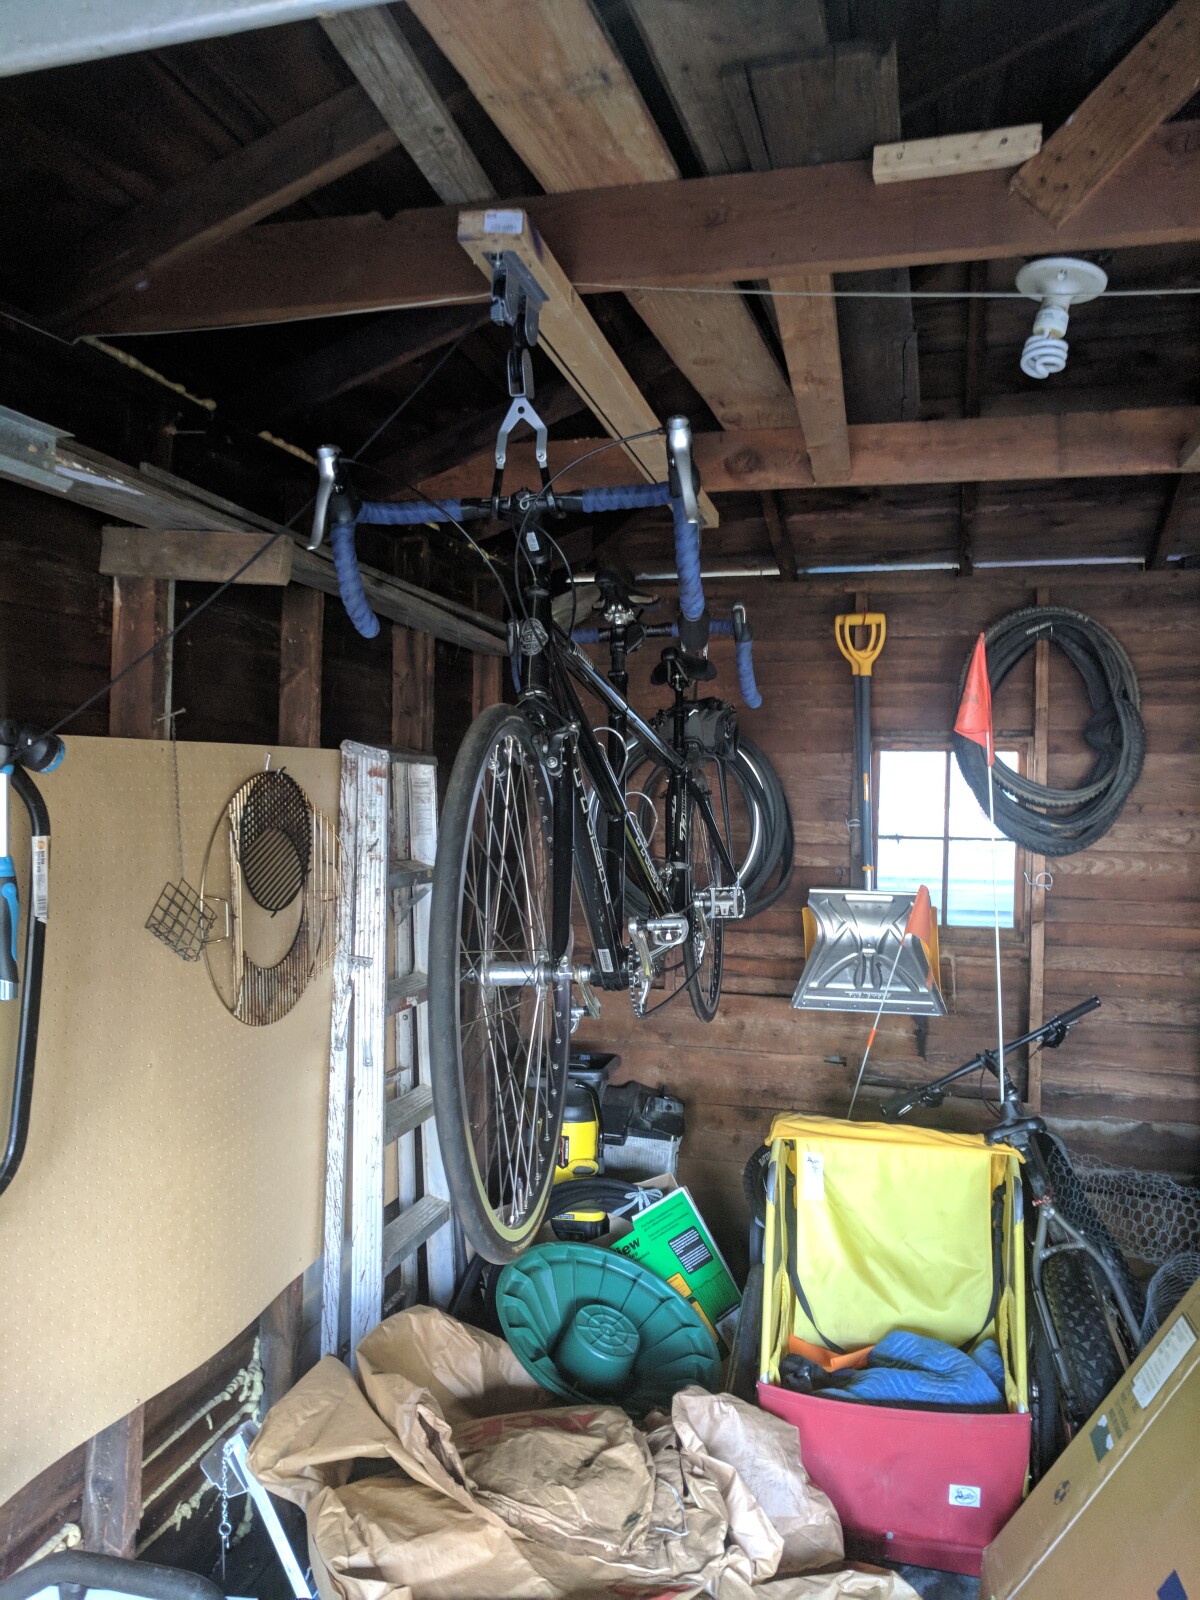
We acquired a tandem bike from a family member, which seemed like the perfect use for a bike hoist I had picked up years earlier. I screwed up some 2x4 supports to mount that to the rafters. The bike hangs and our bike trailers and lawn mowers go on the floor under and around it.
That’s it for now
Someday this garage will lean a little too far and fall over. We’re hoping that’s a few decades out still, but who knows.
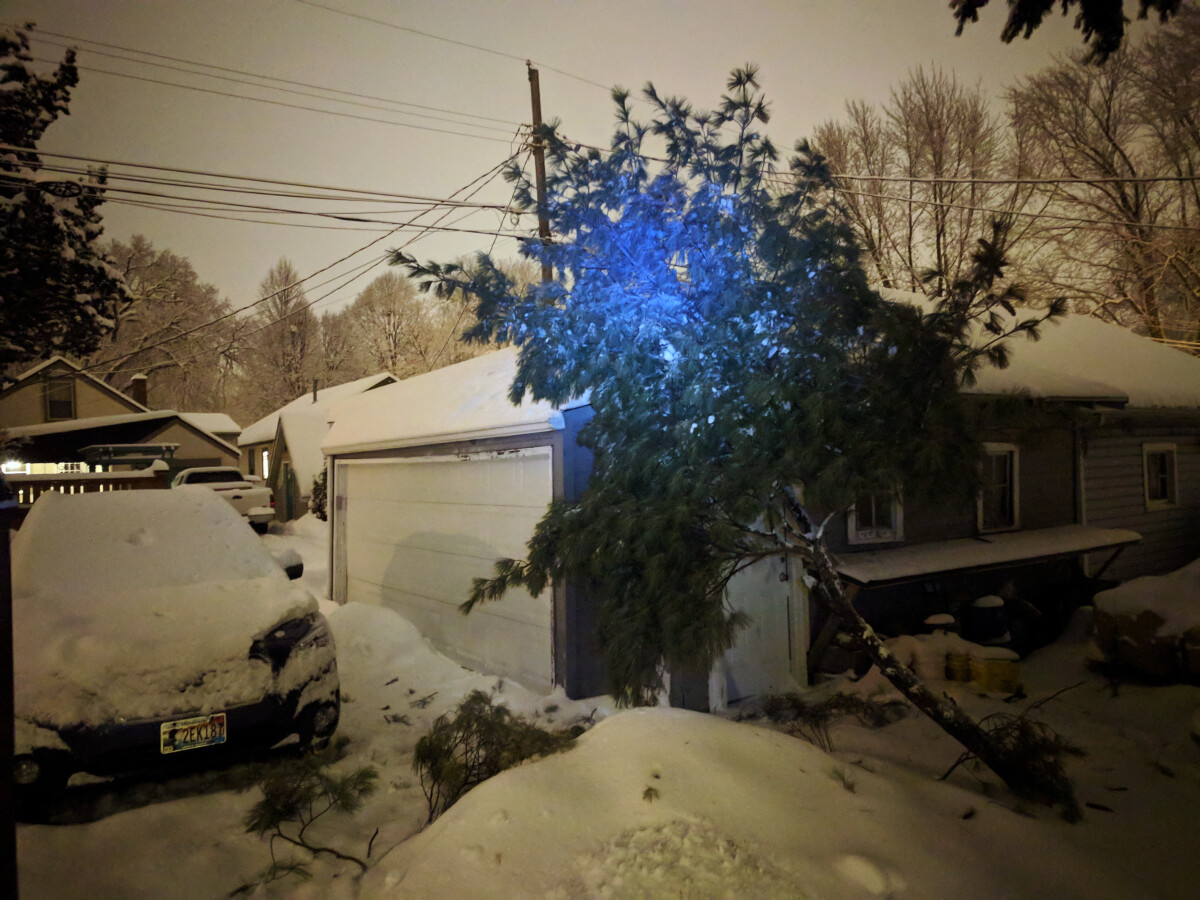
This branch tried to kill the garage. It did not succeed.
Until then, it’s certainly not a perfect space but it’s good enough, and I’m happy that we’ve made it functional for our lives with only a very small investment of money.
The sides of the entrance had a bunch of random auto parts stickers. I scraped all of them off with a putty knife except for this Pabst one, which I think I’ll leave.
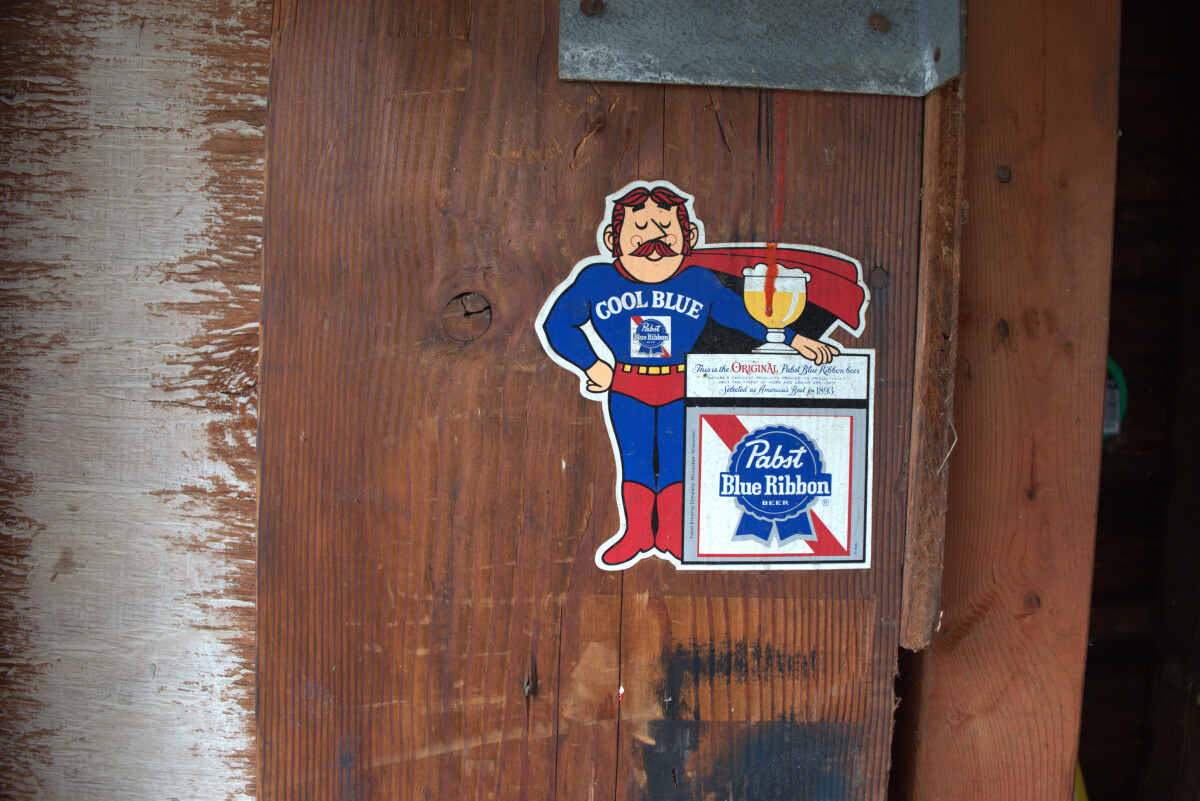
Not that I actually like PBR (gustatorily or ideologically), but I like that it is legitimately vintage at this point, and it serves as a very small reminder of what this garage has seen, and of the weird chain-smoker who loved it.
Time & Materials
| Demo | ~15 hours | |
| Door install | ~15 hours | |
| Organization | several lifetimes | |
| Total | ~30 hours | |
| Crowbar | ~$15 | |
| Dust masks | ~$5 | |
| Security door | $110 | |
| Doorknob and lock kit | ~$40 | |
| Pegboard and accessories | ~$20 | |
| Bike hoist | owned | |
| Storage shelves (2) | ~$120 | |
| Tool rack | $18 | |
| Nifty hooks | ~$20 | |
| Total | ~$350 | |